By default, WordPress provides list tables with some information about your posts, pages, users, comments, and media, but it’s not that much. You can see some general info, such as title, date, author, comments…
But what if you need to get more insight at a glance?
This happened to me a couple of times. For example, once, I started changing all my posts’ featured images because they were not looking very nice.
Now, sometimes, I’d forget where I left off, and to see if I changed a featured image or not, I had to preview the post to check. That cost me even more time. Not to mention that it was annoying.
It would have been nice to see the featured images in the admin Posts table, no? I could have easily spotted the ones that were changed or not.
The same thing happened when I wanted to make changes to some meta descriptions for the posts. I had to check each post to see the meta description.
It would have been a lot quicker if I could’ve seen the meta descriptions right in the Posts table.
So, to save you some time, I’ll show you how to add columns to your WordPress admin tables for posts, pages, comments, users, and media.
Let’s get started!
How to Add Columns to WordPress Admin Tables with a Free Plugin
To add columns to your WordPress admin tables, you’ll have to use a plugin, unless you know WordPress development. 😀
For this tutorial, I’ll use a simple and free plugin called Admin Columns. This plugin allows you to add, remove, or edit the columns from the WordPress admin tables for:
- Posts;
- Custom post types;
- Pages;
- Users;
- Comments;
- Media.
Looking to Buy or Sell WordPress Sites?
At ReadyShip, we offer an all-in-one WordPress solution for those looking to start a blog or site, as well as the opportunity for WordPress developers or professionals to sell their products!
Step 1
Install and activate the Admin Columns plugin.
If you need help, here are 4 ways to install a plugin in WordPress.
Step 2
To access the plugin’s settings, go to Settings > Admin Columns from your WordPress dashboard’s menu.
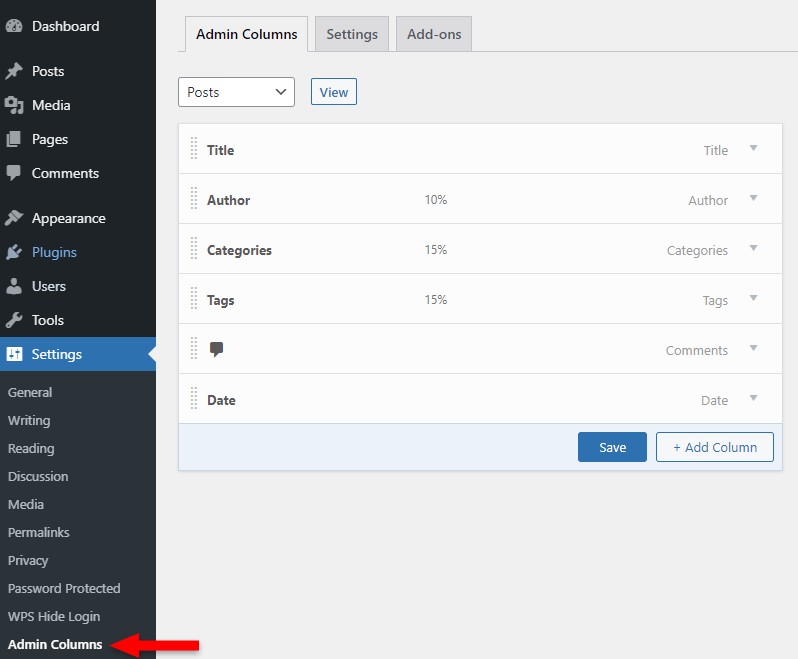
There is where you’ll add, remove, or edit the columns from the WordPress admin tables.
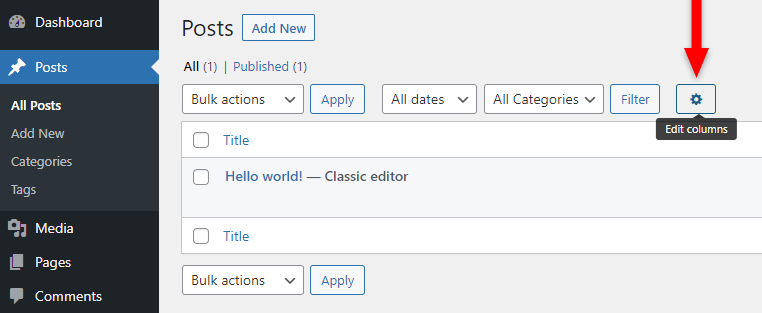
Also, in each section (i.e. Posts, Pages, Users, Comments, Media), there’s a button with a gear icon that you can click, next to the Filter button. It will bring you here, to the plugin’s settings.
Step 3
Now, let’s see how to add a column in a WordPress admin table.
Things are the same for each section, so I won’t show you an example for each one. I’ll only show you an example using the Posts section. You can apply that example to add a column in any other list table, such as Users.
From the drop-down menu, select the admin section where you want to add the table column(s). As I previously mentioned, I’ll use the Posts list table for my example.
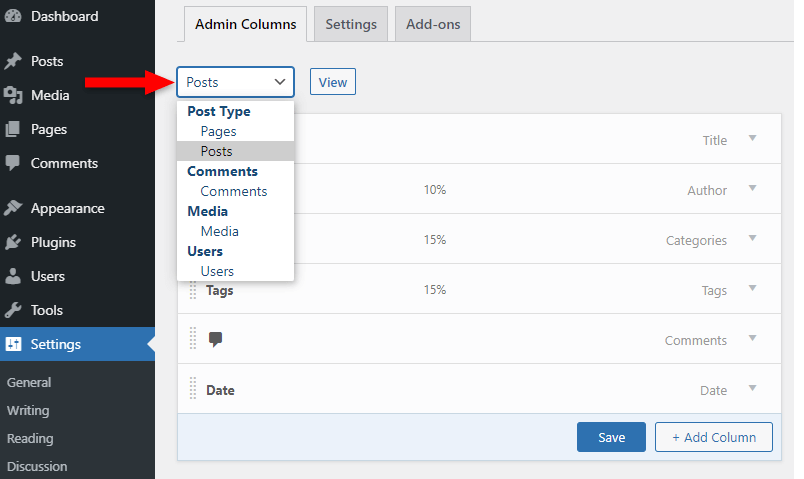
The change will take place automatically. You don’t have to click on the View button. That button will send you to the corresponding admin section to view the list table.
Step 4
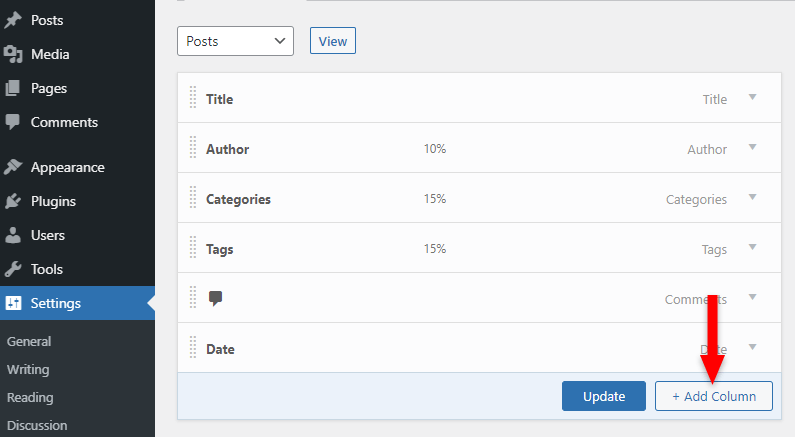
After you’ve selected the proper admin section, click on the Add Column button to bring up the options.
Step 5
From the Type drop-down menu, you can choose from a multitude of options, such as post ID, Excerpt, Last Modified, Attachments, and a lot more.
It depends on what info you want the newly added column to show.
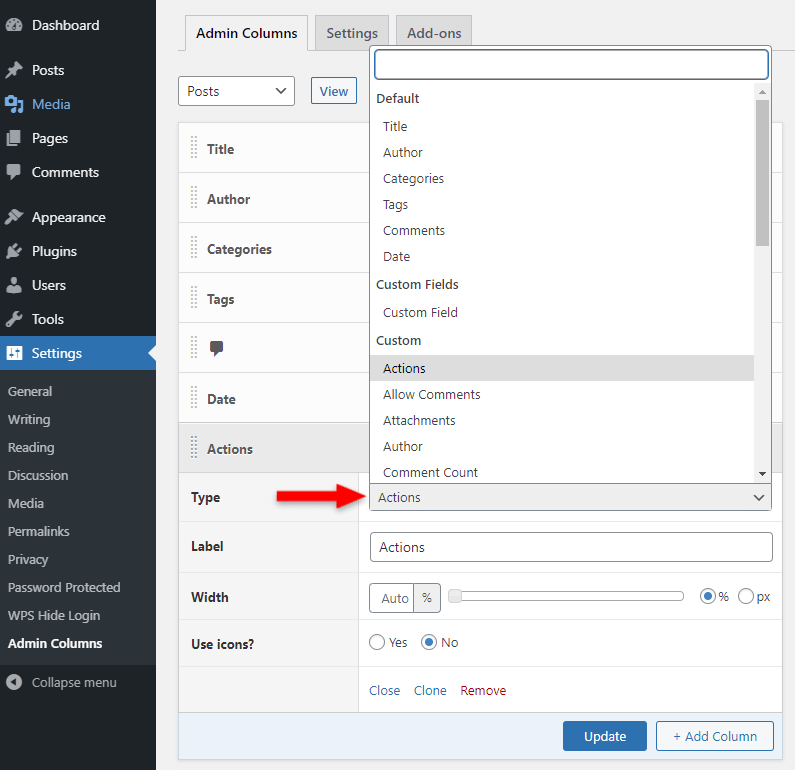
I’m going to choose Featured Image so it can be displayed in a column, in the Posts list table.
Note that, depending on what you choose, additional specific options may appear. For example, for the Featured Image option, an Image Size section will appear with additional inputs: Custom Size, Width, and Height.
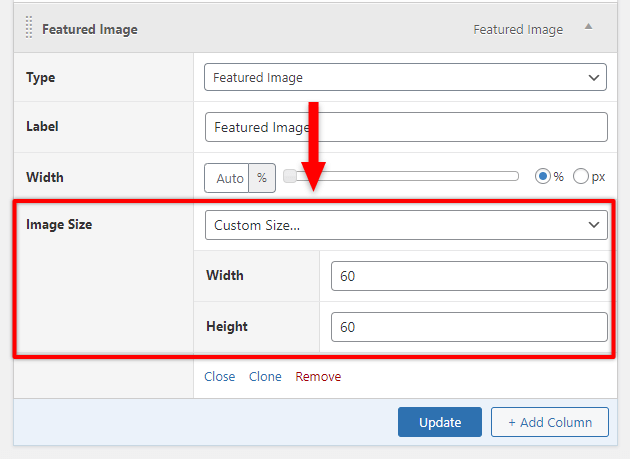
So, only Type, Label, and Width inputs remain the same. The rest of the extra options will be generated dynamically, depending on what you select from the Type drop-down.
After choosing the type, add a Label, which will be the title of the column, and select the Width of the column.
Unless you have a reason to make the column a certain width, I recommend leaving it default, which is Auto. Otherwise, it can mess up the whole list table.
If you do want to change it, I recommend using percentage (%), not pixels (px), to maintain a proper responsive design.
Once you’re done, click on the Save button.
Step 6
Most of you will want to reorder the columns in the WordPress admin tables. For example, I want my Featured Image to be displayed in the first column.
Fortunately, the Admin Columns plugin allows you to do that easily by simply dragging and dropping the columns.
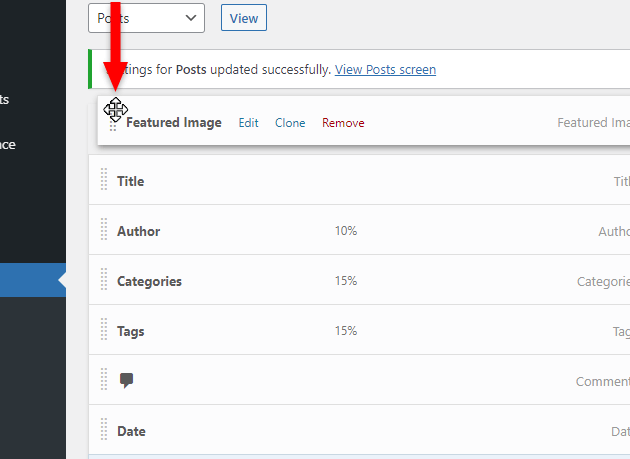
Just hover your mouse cursor over those two vertical dotted lines until it turns into a drag cursor. Then, click, hold, and drag to reorder the columns.
Remember to click the Update or Save button after reordering the columns.
Step 7
Check your newly added column in the WordPress admin table.
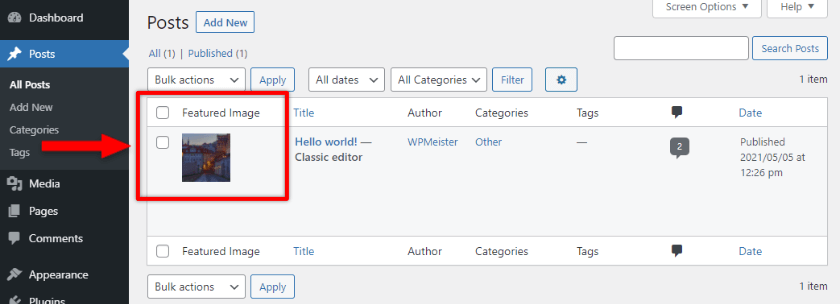
As you can see from the above screenshot, I now have a newly added Featured Image column in the Posts list table. And it’s also set as the first column, as I reordered it at step 6.
Now, following my example, you can add columns to your other list tables in WordPress, such as Custom Post Types, Pages, Users, Comments, and Media.
The process is exactly the same, except that the options you have in the Type drop-down menu will differ. They will be specific for that WordPress admin section.
For example, you won’t be able to add a Featured Image column in the Comments table.
Also, remember that you can remove or edit even the default columns provided by WordPress for its list tables.
Looking for an All-in-One WordPress Solution?
ReadyShip offers you ready-made WordPress sites and blogs, plus high-quality managed AWS hosting with free SSL and CDN, at no initial cost!
More Useful Features in the Pro Version of the Admin Columns Plugins
The free version of Admin Columns provides enough options for many of you. But, some of you might need more, especially those that work with ACF (Advanced Custom Fields) and WooCommerce.
I know that ACF, in particular, is used and loved by many WordPress professionals and even developers.
Here are some of the main features that the Pro version has to offer:
- Compatibility with WooCommerce, ACF (Advanced Custom Fields), MetaBox, Yoast SEO, and more;
- Smart filtering to help you narrow down the search results;
- Sort by column allows you to click on a column’s title to sort the content;
- Quick edit allows you to edit the field values right in the list tables, without going to the plugin’s settings;
- Bulk edit allows you to update the information for multiple field values;
- Export to CSV to export your list tables;
- Horizontal scrolling for the list tables, in case you have too many columns added;
- User conditions allow each of your WordPress users to have their own personalized table view;
- Multisite support.
The End
As you can see, adding columns to your WordPress admin tables is very easy with the Admin Columns plugin. I hope that you managed to do it without any issues.
If you have questions or thoughts, feel free to drop a comment below.