
Plugins are used on virtually every WordPress website. They play a major role in WordPress’ incredible flexibility that everyone loves.
Normally, WordPress plugins can be installed easily, but there are some situations where you’ll need to take a different approach. And if you’re a beginner, this can be tricky.
Therefore, in this step-by-step tutorial, I’ll show you how to install a plugin in WordPress in 4 different ways, from the easiest, automated way, to the more complex, manual way.
1. How to Install a Plugin in WordPress Automatically via Dashboard
This is the easiest way to install a plugin in WordPress, but keep in mind that you can only add plugins that are found in the free WordPress repository.
If you buy a WordPress plugin from a 3rd party source, then you need to check the other methods.
Step 1
From your Dashboard’s menu, go to Plugins > Add New.

Step 2
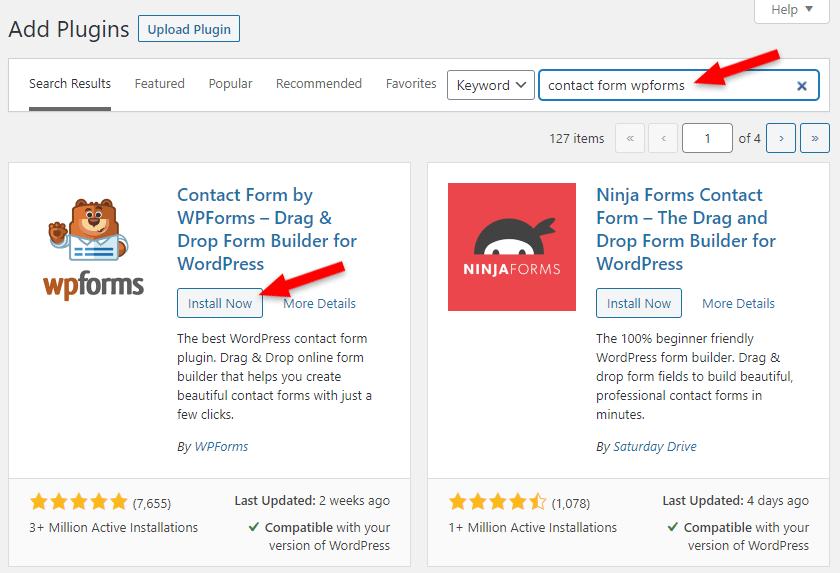
In the search bar, add the name of the WordPress plugin that you’re looking for. The results will appear in real-time, so you don’t need to click a button.
Once the plugin you searched for appears, click on Install Now.
Step 3
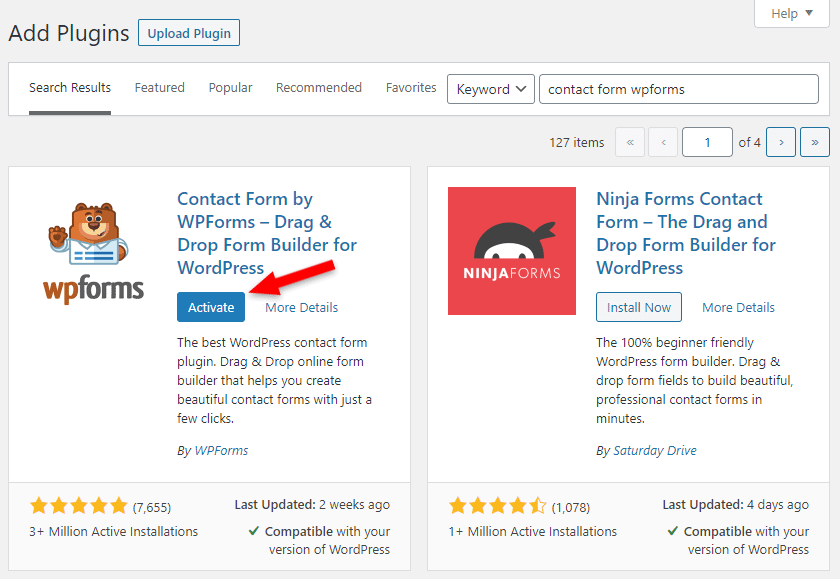
After the WordPress plugin has been installed, it needs to be activated to work. So, click the Activate button that will replace the Install Now button.
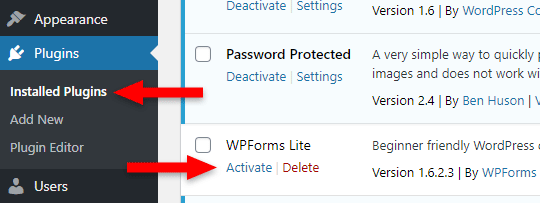
Don’t panic if you forget this step. You can also activate it from Plugins > Installed Plugins whenever you want, by clicking on the Activate link.
2. How to Install a Plugin in WordPress Manually via Dashboard
If you purchase a WordPress plugin from a 3rd party source, or you can’t install a plugin using WordPress’ automated feature, then you can upload and install it manually.
The plugin needs to be in a .zip file. Also, make sure you only upload the installation file, not the whole archive that also contains the documentation and other stuff from the developers. Open the archive on your computer, first, to see what it contains.
Step 1
From your Dashboard’s menu, go to Plugins > Add New.
Step 2
Click on the Upload Plugin button at the top.

Step 3
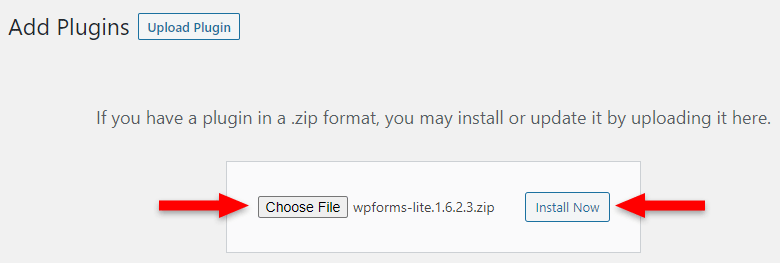
Click the Choose File button and select the WordPress plugin’s .zip file from your computer, where you downloaded it.
Then, click the Install Now button.
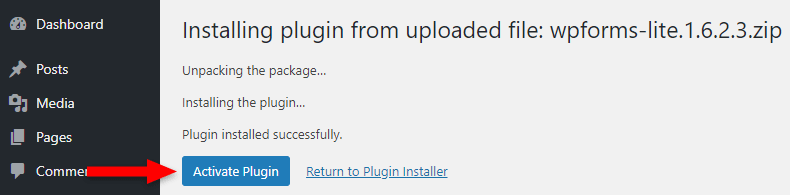
Step 4
You’ll be redirected to a page where it lets you know if the WordPress plugin has been installed successfully or not. I’ll assume it has. 😀
There, click on the Activate Plugin button. Otherwise, it won’t work.
You can also activate the plugin later from Plugins > Installed Plugins, by clicking on the Activate link.
Looking to Buy or Sell WordPress Sites?
At ReadyShip, we offer an all-in-one WordPress solution for those looking to start a blog or site, as well as the opportunity for WordPress developers or professionals to sell their products!
3. How to Install a Plugin in WordPress Manually via cPanel
If you’re on a shared WordPress hosting, then you most likely have access to cPanel.
Basically, cPanel is your server’s control panel that allows you to perform different actions, including handling your WordPress files.
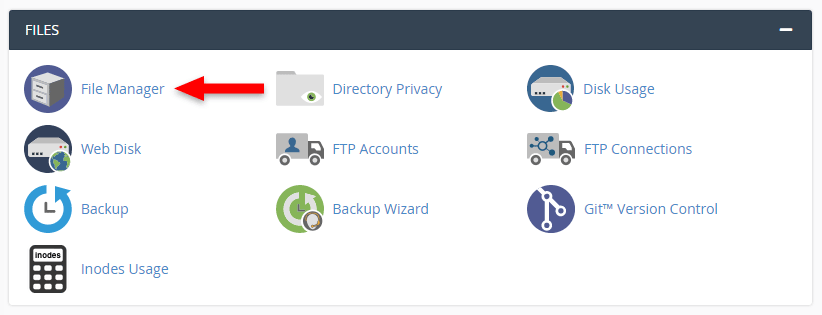
Step 1
Access cPanel – usually by adding /cpanel after your domain – log in to it, then access the File Manager.
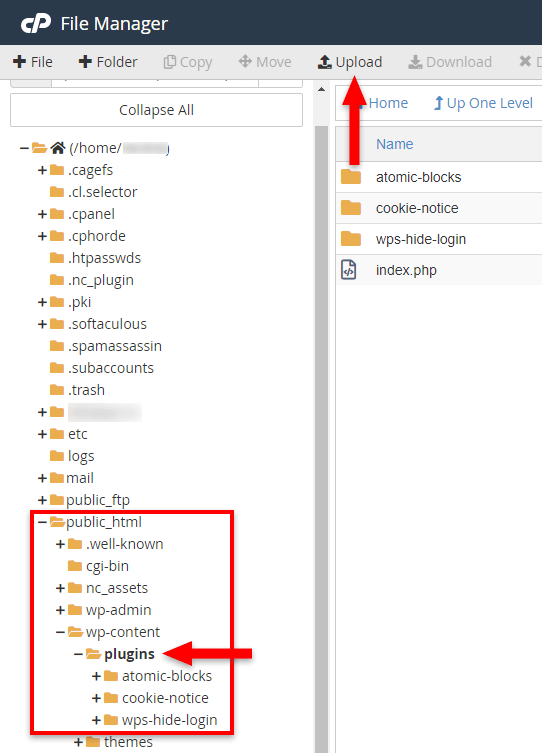
Step 2
Access the plugins folder found in public_html/wp-content/plugins.
If you’re doing this for an add-on domain, not your main domain, then there might be a folder with your domain name, instead of public_html.
Once you’re in that folder, click on Upload at the top.
Step 3
A new page will open where you’ll have to upload the WordPress plugin file.
So, click on the Select File button, select the plugin file from your computer, wait for the upload to reach 100%, then click on the Go Back link.
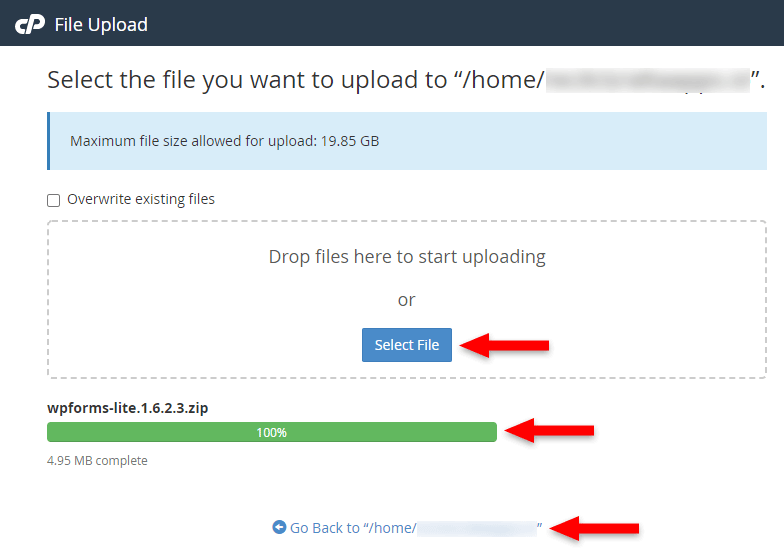
The Go Back link might not send you exactly to the plugins folder, especially if the upload page was opened in a new tab.
If that’s the case, access the plugins folder yourself again.
Step 4
In the plugins folder, extract the contents of the .zip file by right-clicking on it and selecting Extract.
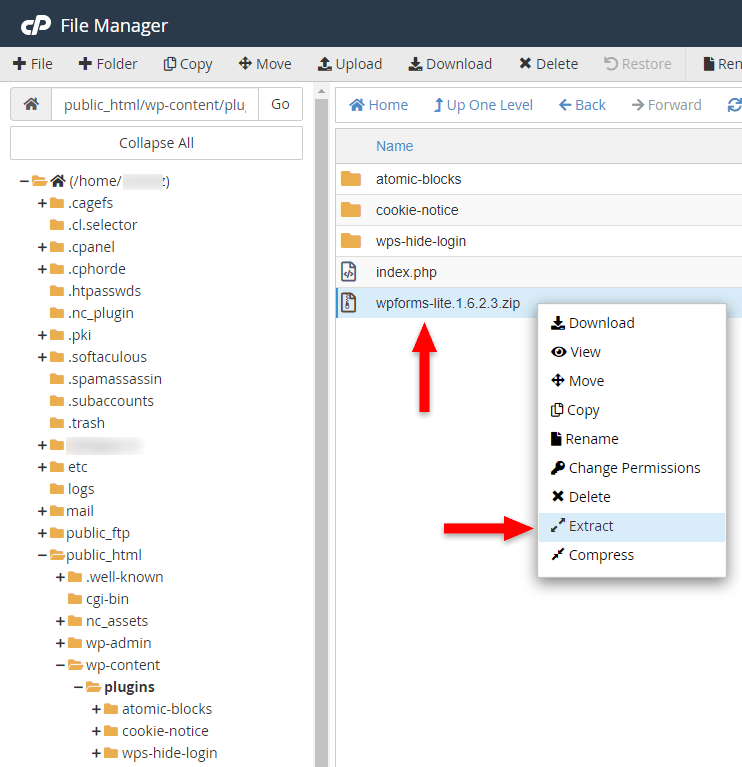
You also have an Extract button in the toolbox above.
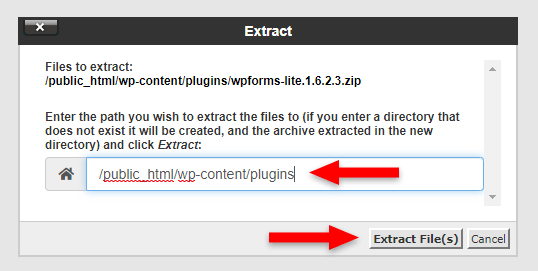
A confirmation pop-up will appear with the path of the installation.
Normally, the path is added automatically, but check it to make sure that you’re installing the WordPress plugin in the /wp-content/plugins folder.
If the path is correct, click Extract File(s).
After that, a pop-up with the Extraction Results will appear, where it shows you what has been extracted.
It’s just some info, so you can go ahead and close it by clicking the Close button.
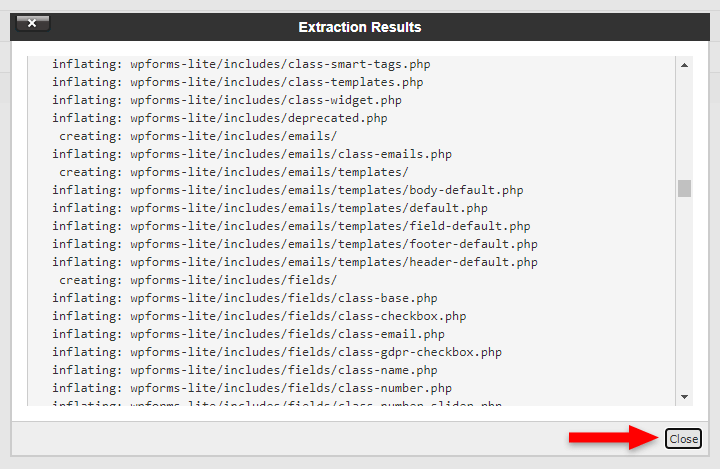
After that, you can see the WordPress plugin installed there.
Step 5
Since you don’t need that .zip file anymore, there’s no reason to leave it there.
So, right-click on it and select Delete.

You can also use the Delete button from the toolbox, at the top.
A confirmation pop-up will most likely appear to ask you if you want to move the file to the trash.
Check the box where it says “Skip the trash and permanently delete the files” and click on the Confirm button.
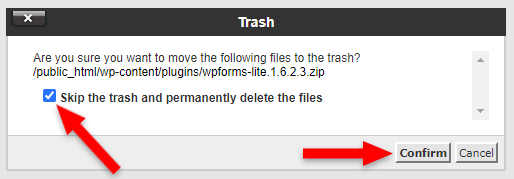
There’s no need for it to linger in the trash.
Step 6
Go into your WordPress Dashboard.
If everything worked fine, you’ll find the plugin in Plugins > Installed Plugins, where it needs to be activated by clicking on the Activate button.

4. How to Install a Plugin in WordPress Manually via FTP
Unlike Shared hosts, Managed hosts, such as ReadyShip, that offer Cloud or VPS hosting, don’t normally use cPanel because they are more focused on optimization and performance.
So, you’ll have to install a WordPress plugin via FTP (File Transfer Protocol), using an FTP client.
Step 1
Download and install FileZilla, the FTP client that I recommend, on your computer.
Step 2
After you’ve installed FileZilla, open it.
At the top, you have to provide some login information to have access to your server’s FTP.

You need to get this information from your hosting company. You might find it in your account, or in your email after the setup, or you’ll have to contact them.
- Host – Usually, hosting companies offer FTP or SFTP, which is a more secure option. So, you’ll have to add something like
ftp.example.comorsftp//:example.com. Of course, replaceexample.comwith your own domain. You can also use the IP instead of your domain. - Username and Password are self-explanatory.
- Port – You can leave it empty for the default port 21. If your host uses another port, add it there.
- Quickconnect – It will quickly connect to your FTP if the login info is correct.
Alternatively, you can add your site in the Site Manager, so you won’t have to always add the login info there.
Go to File > Site Manager and:
- Click on New site and name it however you wish;
- Choose the type of Protocol that your hosting offers;
- Add the Host, such as
ftp.example.com; - Add the Username and Password;
- Click on Connect.
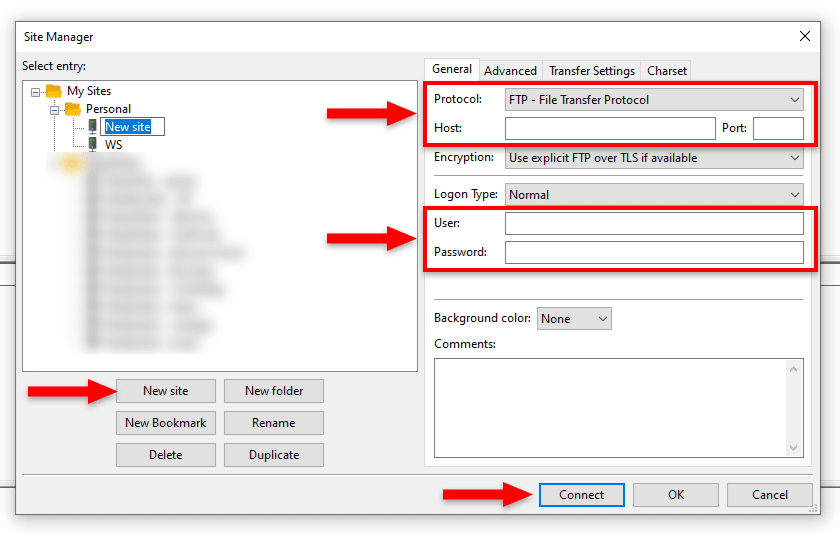
You can leave everything else as is unless your host requires other settings.
Now, your FTP info is saved there, and you can connect to it by going to File > Site Manager, then selecting your site and clicking on Connect.
Step 3
Unzip the WordPress plugin’s .zip file on your computer because FileZilla doesn’t have an extract option.
Make sure that the extracted folder only contains the plugin files, not an additional folder! Sometimes, the main plugin folder is added inside an extra folder when unzipping on your computer.
So, it shouldn’t be:
folder/folder/plugin filesIt should be:
folder/plugin files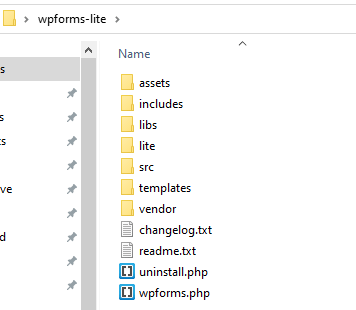
Also, don’t rename the main folder plugin!
Step 4
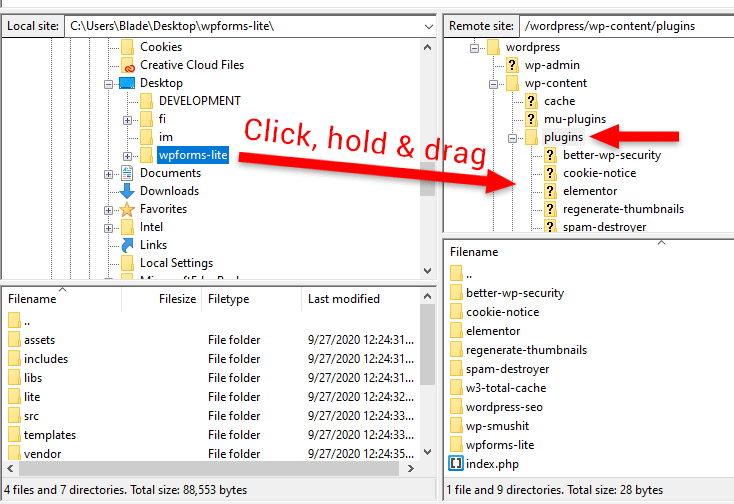
In FileZilla, your computer files are on the left, in the Local site: section, and your WordPress files are on the right, in the Remote site: section.
So, first, access your WordPress plugins folder, which is usually found in public_html/wp-content/plugins, but some Managed hosts don’t use the public_html folder.
In my case, my WordPress files are in a folder named wordpress.
Once the plugins folder is selected, select the unzipped plugin folder from your computer, from the left, then click, hold, and drag it in the plugins folder, on the right.
Since it’s transferring file by file, it will take a while depending on how many files the WordPress plugin has.
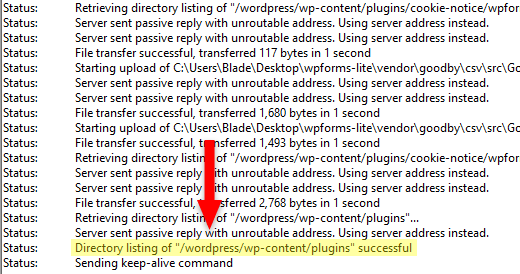
You can see the work in progress at the bottom. The Queued files tab lets you know how many files remain to be transferred.
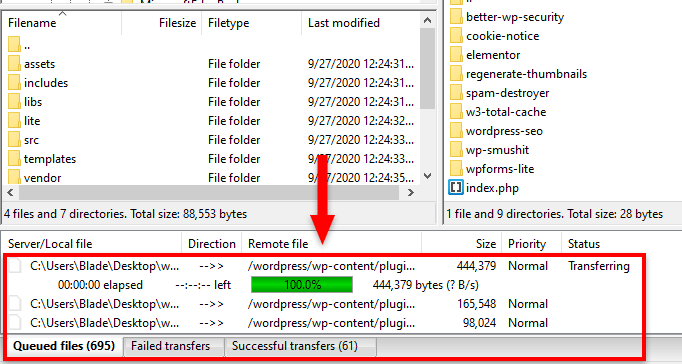
You’ll also see a bunch of statuses popping up above.
The transfer will end when you’ll see a status like Directory listing of “…/wp-content/plugins” successful.
Step 5
If everything went well, and the plugin was installed in WordPress successfully, you’ll see it in your Dashboard, in Plugins > Installed Plugins, where you’ll have to activate it by clicking on the Activate link.
Looking to Buy or Sell WordPress Sites?
At ReadyShip, we offer an all-in-one WordPress solution for those looking to start a blog or site, as well as the opportunity for WordPress developers or professionals to sell their products!
The End
Different situations require different ways to install a plugin in WordPress. I hope that I comprehensively covered all 4 of them, and you didn’t encounter any problems.
If you have questions or thoughts, feel free to leave a comment below!