At some point in your “WordPress life”, you’ll most likely need to access and edit your WordPress files to change something on your website.
The most common files to edit are:
- WordPress Core files, found in the root folder, usually named
public_html:wp-config.php– Allows you to modify parts of the WordPress configuration, such as automatically removing items from the Trash, disabling revisions, etc..htaccess– An Apache server file that allows you to perform different actions at a server level, such as URL redirection, enabling GZIP compression, etc.
- WordPress theme files, found in a folder named after the theme, which is found in
/wp-content/themes/:functions.php– Allows you to add, remove, or change different functionalities on your theme, such as removing the featured image, changing the heading element (e.g. H2) of the titles, etc.style.css– Allows you to add custom CSS code to change parts of your theme’s design (colors, font, etc.).
So, in this step-by-step tutorial, I’ll show you 3 different ways to access and edit your WordPress files.
Important Notes
In order not to repeat this in every section, I’ll just mention it once here.
Having a child theme
When you edit a WordPress theme’s files, you should do it in a child theme.
If you’re making the changes directly into the parent theme, they’ll be gone with the next update, and you’ll need to add them again.
Most premium WordPress themes provide a pre-made child theme when you download the files. If it’s not there, ask the developers for one.
Backing up the files or entire site
If you don’t have any experience with file editing in WordPress, it’s better to perform a backup before making any changes that might break your site.
I’ll also show you how to back up your files individually, where possible.
Editing plugin files
Unlike WordPress themes, plugins don’t have a “child plugin” feature, so any changes that you make will go away with the next update.
As a general rule, I recommend never touching a WordPress plugin’s core code unless you really know what you’re doing.
Editing WordPress Core files
Except for the wp-config.php and .htaccess files, you shouldn’t edit any other core files because the changes will be gone when WordPress updates.
Those two files won’t get replaced on updates.
If the changes don’t take effect
If the code is correct and added properly, but the changes still don’t appear when you refresh your page/site, then clear any WordPress cache that you might have from your browser, plugin, server, and/or CDN.
Looking to Buy or Sell WordPress Sites?
At ReadyShip, we offer an all-in-one WordPress solution for those looking to start a blog or site, as well as the opportunity for WordPress developers or professionals to sell their products!
1. How to Access and Edit Theme Files via Dashboard
I don’t recommend using this method unless you have access to FTP or cPanel to undo whatever might break, which could prevent you from accessing your website.
I only mentioned theme files because you can’t access the WordPress core files here. For that, check the other two methods.
Step 1
This feature might be disabled by some security plugins or code snippets.
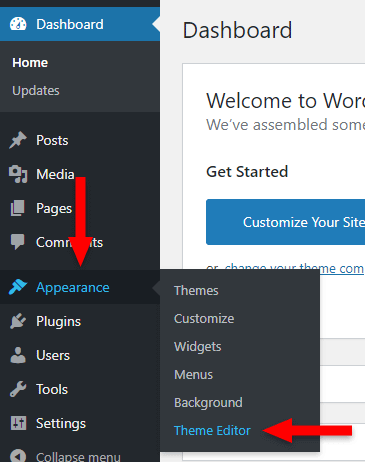
Log in to WordPress and access Appearance > Theme Editor.
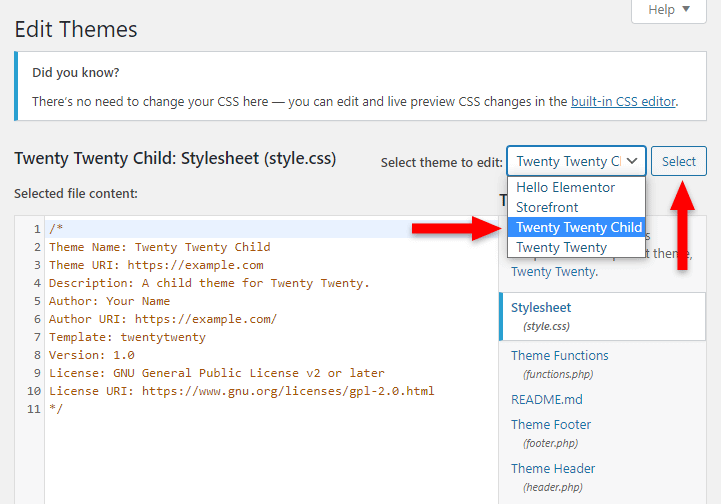
Step 2
By default, the WordPress theme that’s currently active is selected. If you want to access another theme, select it from the drop-down menu and click on Select.
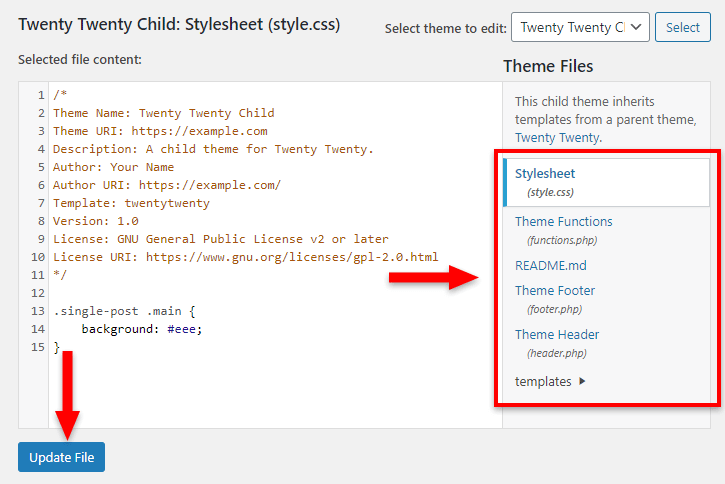
Step 3
From the right, select the WordPress theme file that you want to edit. Make the changes and click on the Update File button.
2. How to Access and Edit WordPress Files via cPanel
If you’re on a Shared WordPress hosting, you most likely have cPanel.
cPanel is your server’s control panel where you can perform a lot of different actions, including accessing and editing all of your WordPress files.
Depending on your host, cPanel might be a bit different due to the version used or changes that the hosting company might have made to it.
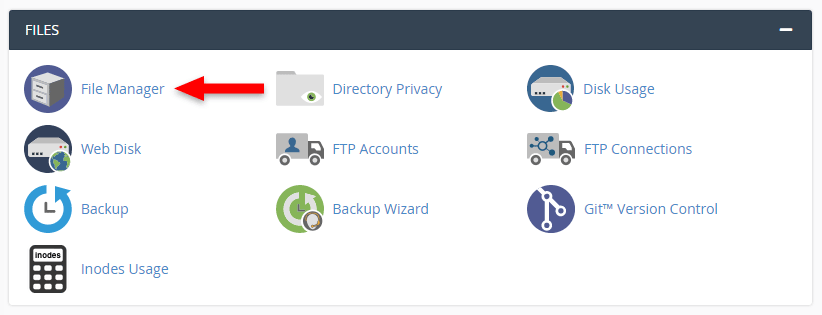
Step 1
Go to cPanel – usually by adding /cpanel after your domain name (e.g. example.com/cpanel) – log in using the credentials offered by your hosting, then access the File Manager.
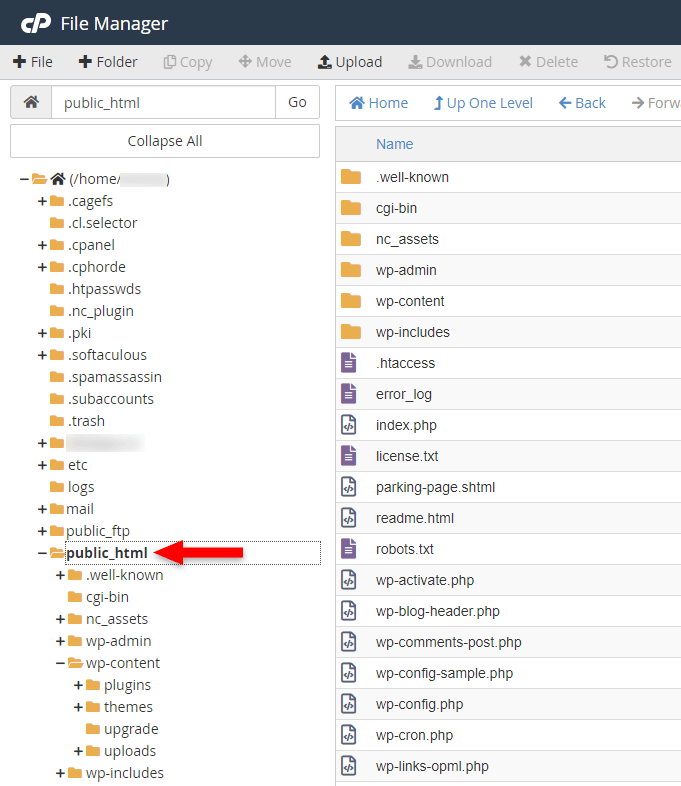
Step 2
Your WordPress core files, along with the theme and plugin files, are usually found in the public_html folder.
If you’re using an add-on domain, not the main one, then the WordPress files will probably be found in a folder that has your domain name (example.com) instead of public_html.
Step 3
Before editing a file, download it on your drive as a backup.
Right-click on it and select Download.
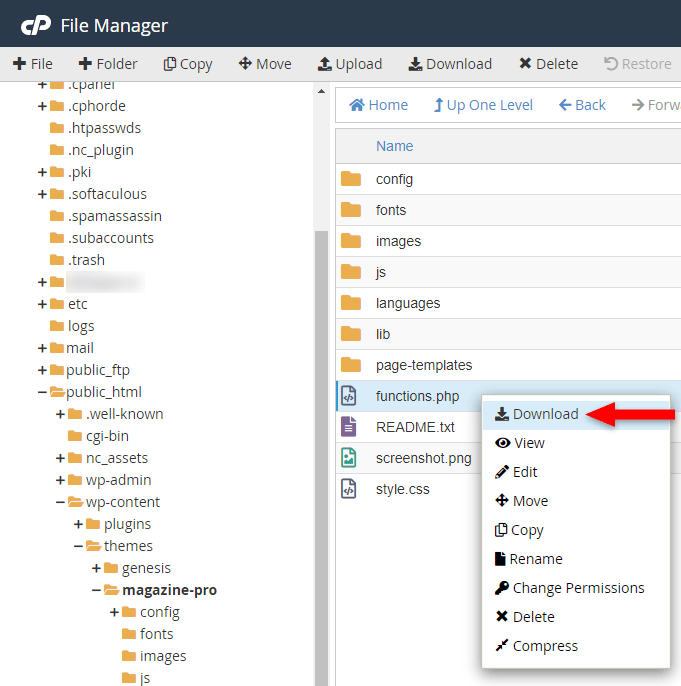
You also have a Download button up, in the toolbar.
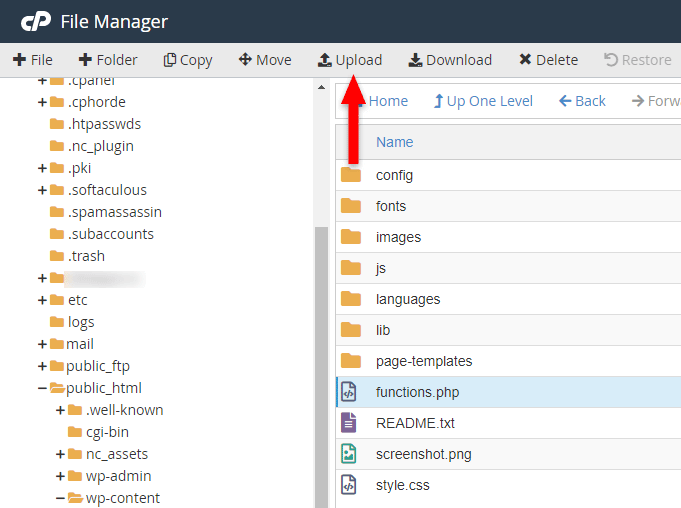
If something goes wrong, you can upload the original WordPress file you saved on your drive, by clicking the Upload button at the top, and it will override the edited file.
Step 4
Now that you have a file backup, you can proceed without sweating. 🙂
So, choose the WordPress file that you want to edit, right-click on it, and select Edit.
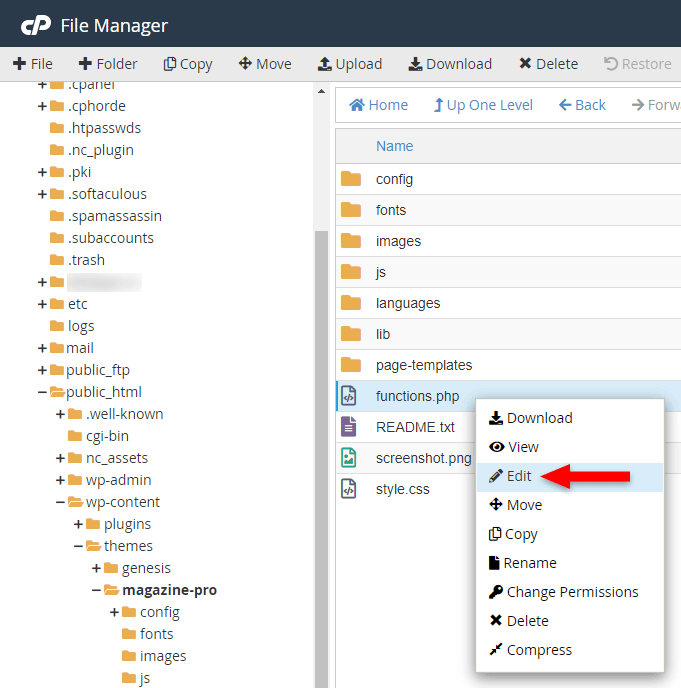
You can also choose View if you only want to look for something without being afraid of editing it by accident.
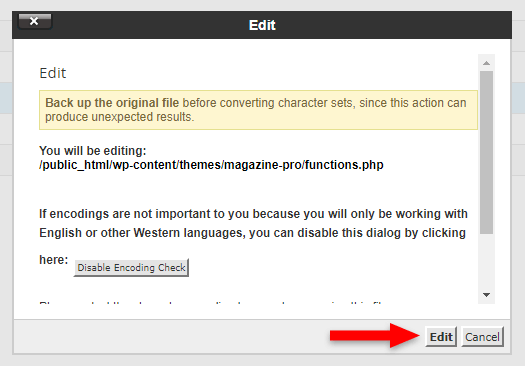
A pop-up will appear, showing you what file you’re about to edit and mentioning that you should back up the files first, which I mentioned as well at step 3.
Click the Edit button to proceed.
Step 5
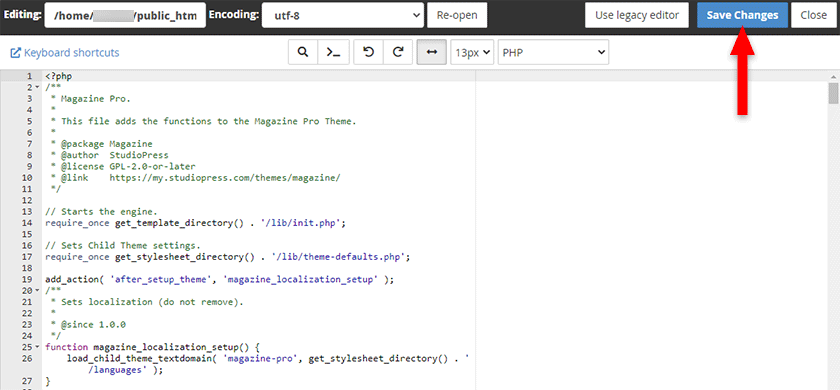
A file editor will appear where you can add, remove, or edit the code snippet that you want.
After you’re done, click on the Save Changes button.
3. How to Access and Edit WordPress Files via FTP
When you’re using Managed hosts that are more performant and optimized, such as the one used on ReadyShip for its WordPress customers, you won’t have cPanel because it eats up server resources and affects its performance.
So, in order to access and edit your WordPress files, you’ll need to do it via FTP (File Transfer Protocol), using an FTP client.
Step 1
Download and install FileZilla, the FTP client I recommend, on your computer.
It offers installation files for both Windows and macOS.
Step 2
After you’ve installed it, open it up.
At the top, you’ll have a Quickconnect feature that will allow you to quickly connect to your server’s FTP.

The login info that you need to add have to be provided by your host:
- Host – Usually, it’s
ftp.example.comorsftp://example.comif using SFTP instead of FTP. You’ll have to replaceexample.comwith your own domain. - Username and Password are self-explanatory.
- Port – Leave it blank for the 21 default port unless your host requires something else.
Alternatively, you can add the site to the Site Manager by going to File > Site Manager. That way, you don’t have to add the login info every time in Quickconnect.
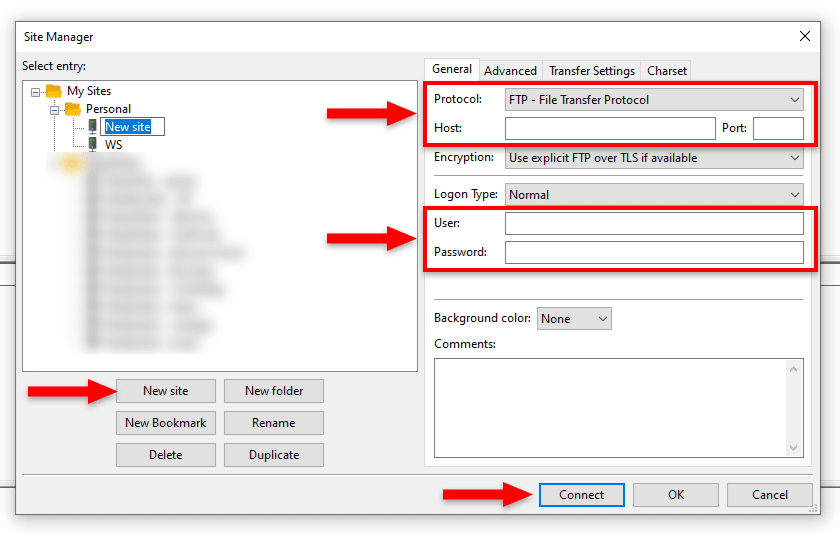
- Click on New Site;
- Add a name for the site;
- Choose FTP or SFTP as the Protocol;
- Add the Host and Port as discussed above;
- Add the User and Password;
- Click on Connect.
Leave everything as is unless instructed otherwise by the hosting company.
Step 3
After you’ve connected to the FTP, your WordPress files will appear on the right, under Remote site:. Underneath, in the Filename section, the subfolders and files will appear.
On the left, the local files from your drive will appear.
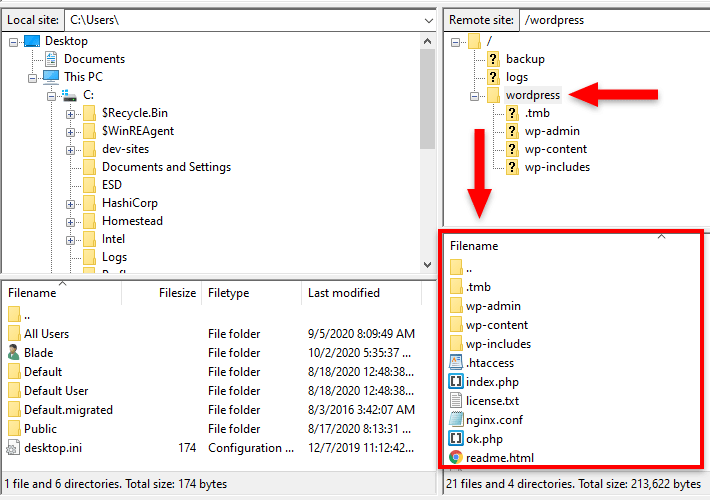
On Managed hosts, there’s a chance that your WordPress files won’t be found in the public_html folder.
You can see from my screenshot that one of the ready-made WordPress sites that I have on ReadyShip’s marketplace, has its files in a folder called wordpress.
Step 4
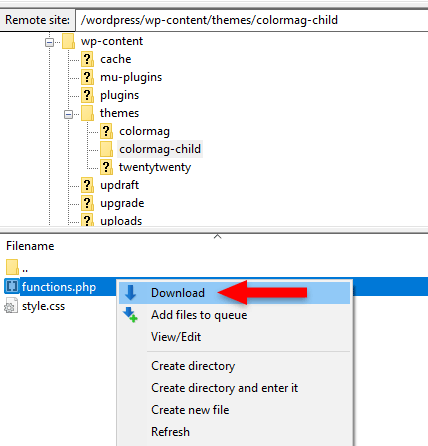
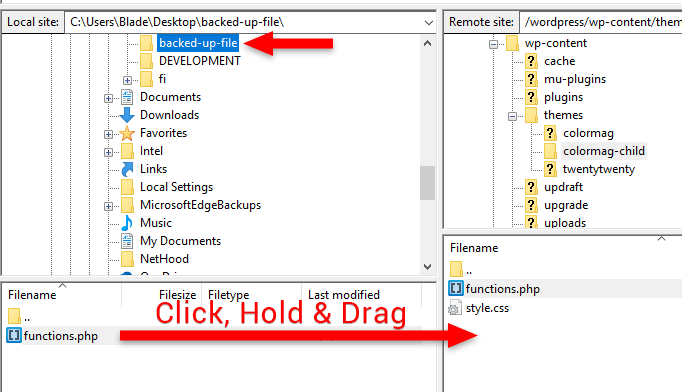
Before editing anything, back up your file by right-clicking on it and selecting Download.
Now, if things go south, you can upload the original WordPress file, replacing the edited one.
To do that, search for your saved file under Local site:, then click, hold, and drag it to the folder on the right, where your WordPress file is.
Step 5
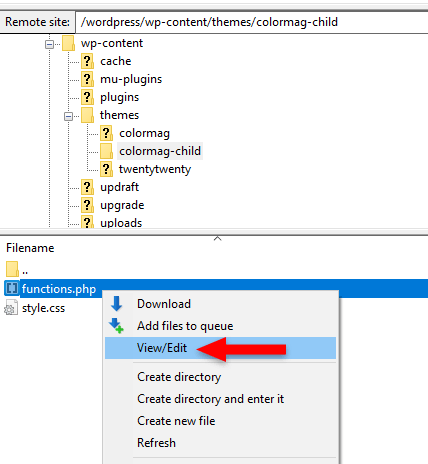
Now that you can safely edit the WordPress file, right-click on it and select View/Edit.
In Windows, by default, the file will be opened with Notepad. I assume it opens with TextEdit in macOS.
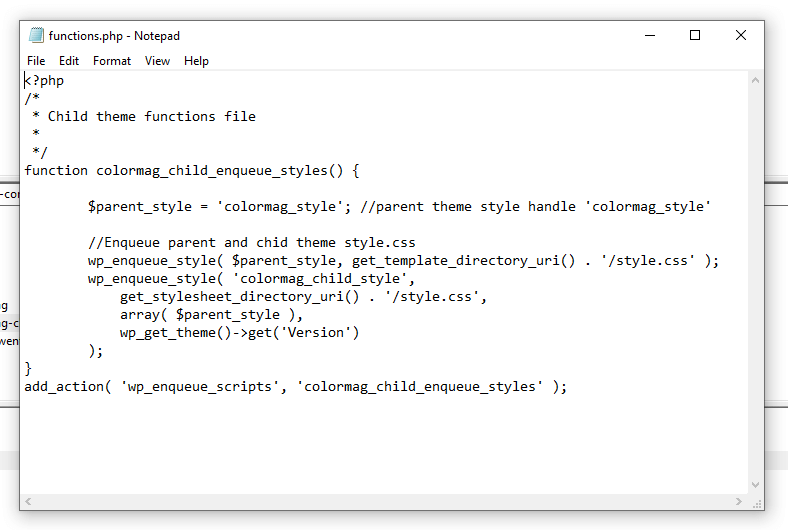
Once you’re done editing the WordPress file, click on File > Save to save it.
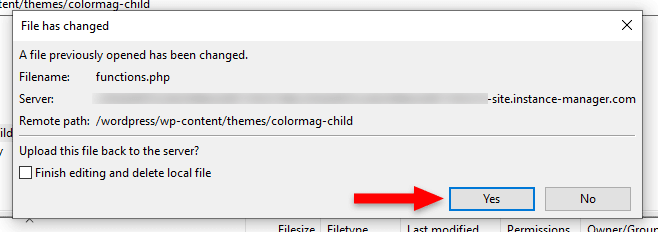
A confirmation pop-up will appear to let you know what file you’ve just edited. Click Yes if everything is correct.
Step 6
Check your Status above.
If everything worked fine, a success status will appear:
File transfer successful, transferred 551 bytes in 1 second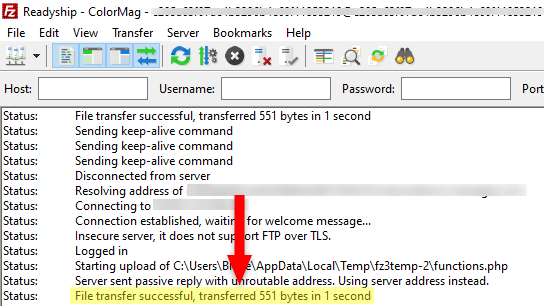
Looking to Buy or Sell WordPress Sites?
At ReadyShip, we offer an all-in-one WordPress solution for those looking to start a blog or site, as well as the opportunity for WordPress developers or professionals to sell their products!
The End
Accessing and editing WordPress files can be quite tricky for a beginner, so I hope that my tutorial was comprehensive enough to simplify the process for you.
If you have any questions or want to pitch in, feel free to leave a comment.