Certain types of features added by a theme or plugin might require you to add the IDs of specific WordPress posts.
For example, you might have installed a plugin that displays featured posts on your homepage. And if you want to display specific posts, not the latest ones, the plugin will most likely ask you to add their IDs.
For beginners, that task might not be so easy. So, in this tutorial, I’ll show you how to find a WordPress post ID using 4 different methods.
1. Find a WordPress Post ID from the Browser’s URL Display
This is the quickest and easiest way to find a post ID in WordPress.
All you have to do is to go to Posts > All Posts and hover your mouse cursor over a post to make the action links show up. Then, hover over the Edit link.
Alternatively, you can hover your mouse cursor over the post’s title.
Now, in the bottom-left part of your browser, the address of the Edit link will appear. A part of it is post=X, where X will be the ID of the post.
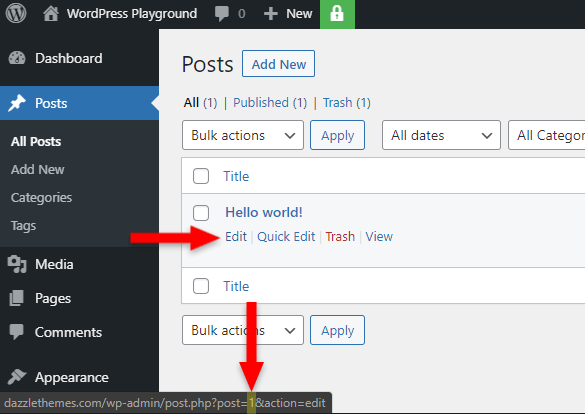
In the above screenshot, you can see post=1, which means that the ID of that WordPress post is 1.
Looking for an All-in-One WordPress Solution?
ReadyShip offers you ready-made WordPress sites and blogs, plus high-quality managed AWS hosting with free SSL and CDN, at no initial cost!
2. Find a WordPress Post ID from the Browser’s Address Bar
This is another quick and easy way to find a post ID in WordPress.
As in the previous method, go to Posts > All Posts, but this time click on the Edit link after hovering on a post from the list. You can also click on the post’s title instead of Edit.
This will open up the post for editing, and in the browser’s address bar you’ll see the editing URL, which will look like this:
https://example.com/wp-admin/post.php?post=1&action=editWhat interests you is the post=X part, where X will be the WordPress post ID.
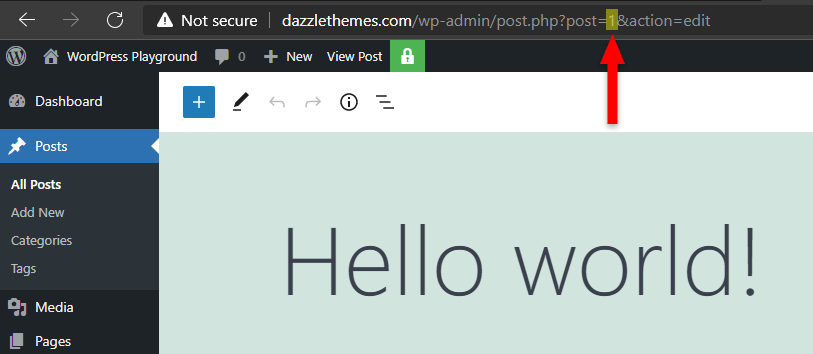
As you can see in my screenshot, post=1, therefore the WordPress post ID is 1.
3. Find a WordPress Post ID Using a Plugin
If you need to find WordPress post IDs often, then you might want to use a plugin that displays them in the Posts table.
All you have to do is to install a WordPress plugin called Show IDs by 99 Robots, and it will automatically show the IDs for the WordPress posts, pages, and taxonomies. It doesn’t have options.
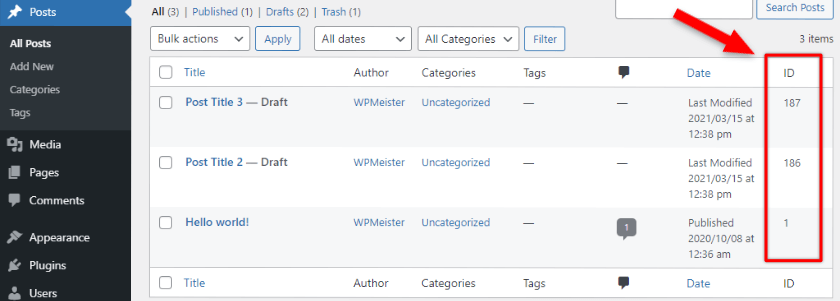
So, after installing and activating the plugin, go to Posts > All Posts. There, you’ll see a new column, called ID, showing the IDs for each WordPress post.
4. Find a WordPress Post ID in Your Database with phpMyAdmin
To find your WordPress post ID in your database using phpMyAdmin, you’ll need to have a web hosting plan with cPanel, which is a control panel filled with tools.
If you’re on a Shared web hosting plan, you’ll most likely have cPanel.
The cPanel interface differs from host to host. So, yours might look different than mine, but the phpMyAdmin tool is there unless the web host removed it.
Working with the database is dangerous. One mistake and you can break the site and/or lose data for good. So, I recommend performing a WordPress backup first.
Step 1
Access cPanel. Usually, you can do this by adding /cpanel after your domain, like this:
https://example.com/cpanel
You’ll need to know your username and password to log in.
Usually, you get those when you purchase your hosting plan. If you don’t have them, check your web host’s documentation or contact support to ask how to get them.
Step 2
Once you’ve logged in, search for the phpMyAdmin tool, which should be under the Databases section.

Step 3
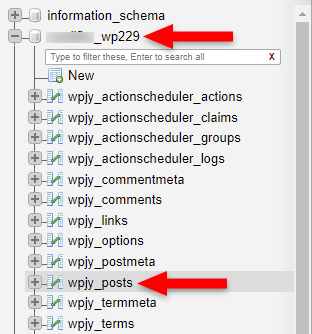
Select your WordPress site’s database from the left. If you have multiple WordPress sites on one account, you might have multiple databases, one for each site. The name of the database differs.
Then, select the table with _posts in its name. Usually, it should be wp_posts, but it might differ depending on how the WordPress installation was done.
Step 4
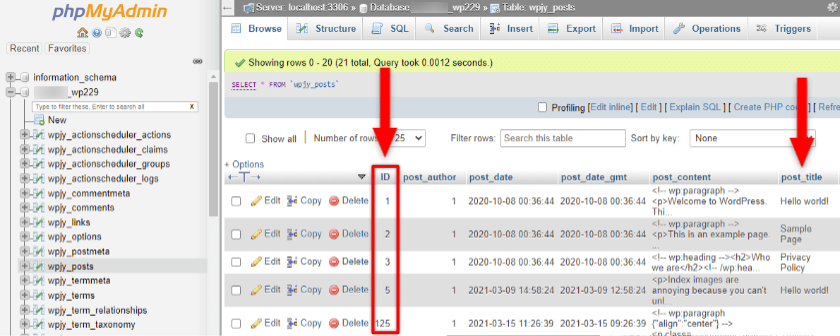
On the right, you’ll see a bunch of columns, one of them being ID, which holds the IDs for all the WordPress posts. You can see the corresponding post title in the post_title column.
Step 5
In WordPress, a bunch of things falls into the post category: pages, attachments, revisions, etc.
They are all post types, therefore stored in the _posts table as well, making it hard for you to quickly separate the blog posts from the rest.
So, here are several ways to sort out the blog posts with post type from the rest, without involving SQL commands.
1) Scroll horizontally to the post_type column and click on its title to sort the results by type.
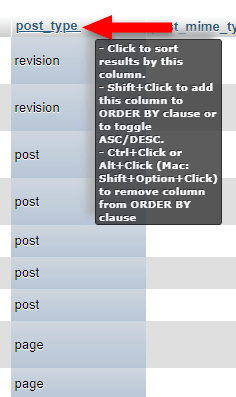
As you can see, the post_type values are now grouped and displayed one after the other. They are not scattered anymore.
2) The second way is to type in post in the Filter rows field. It should automatically display the results.
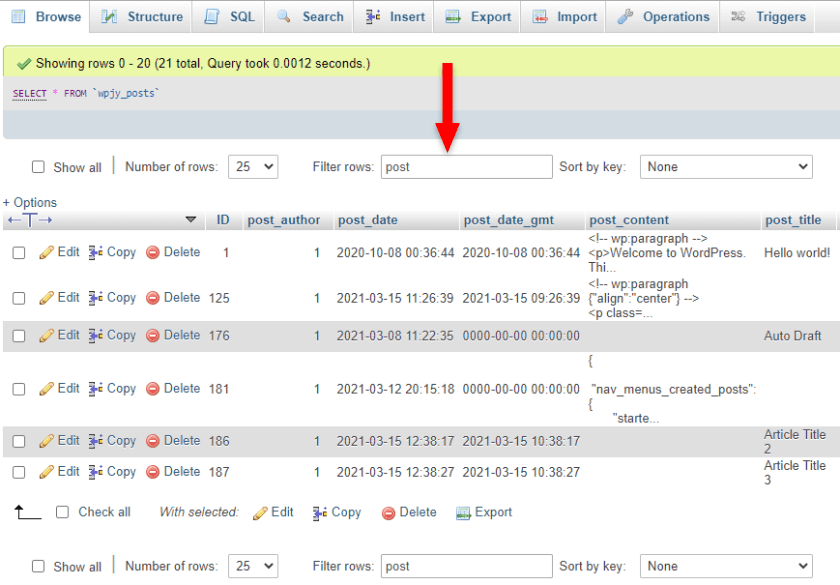
This does a decent job, but it still slips some post types that are not blog posts.
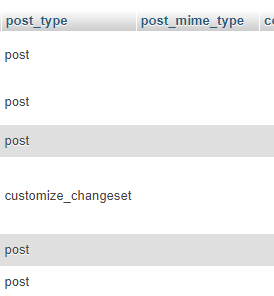
3) This is the third and best way to filter the post types, but it might look a bit scary and complex for some of you beginners.
Here’s what you need to do:
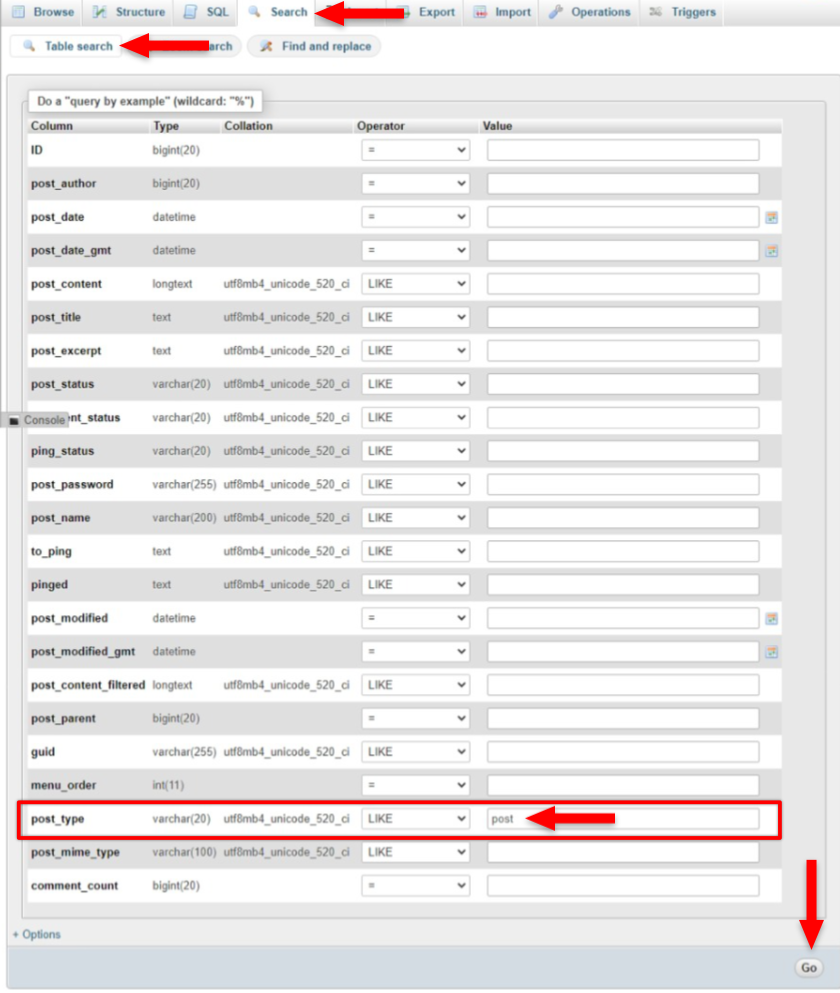
- Switch to the Search tab, at the top;
- Make sure Table search is selected;
- Scroll down to the post_type column;
- In the Value field of the post_type column, type in post;
- Click on the Go button found in the bottom-right.
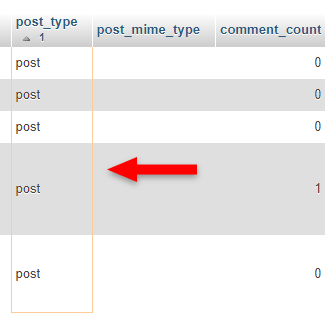
Now, only posts of type post will be shown in the post_type column, which will be highlighted with a yellow border when the results are displayed.
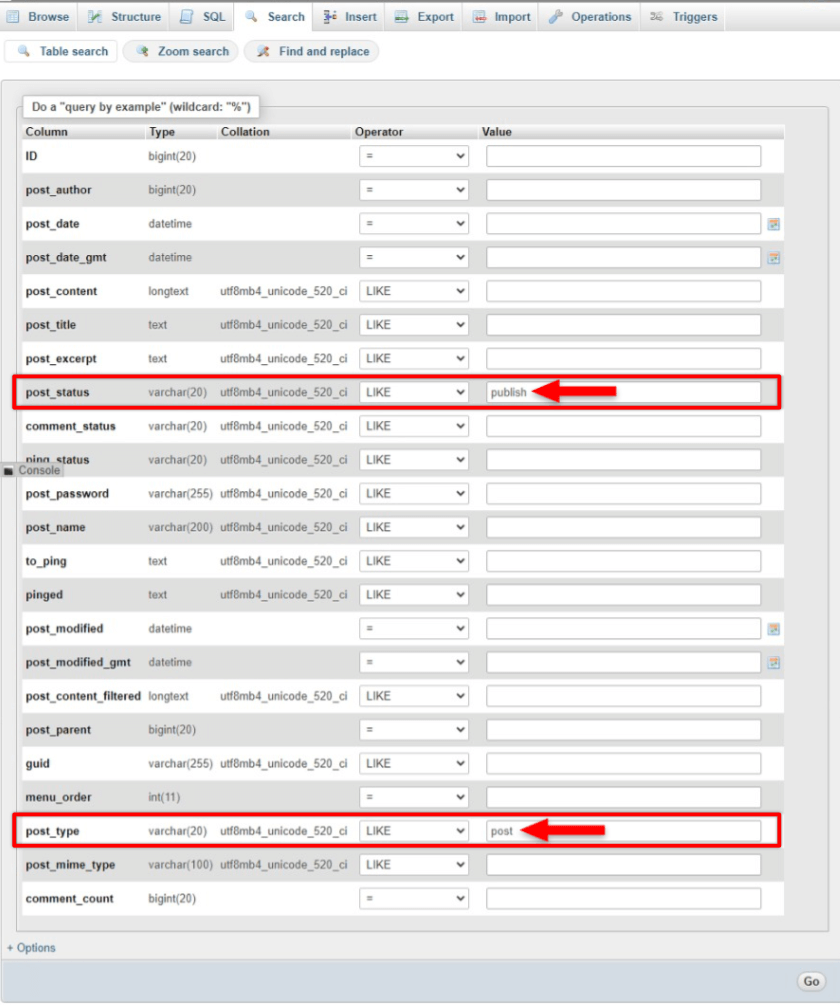
Since you’ll most likely need to find out the IDs of published WordPress posts, not drafts or trashed, you can also add publish in the Value field of the post_status column.
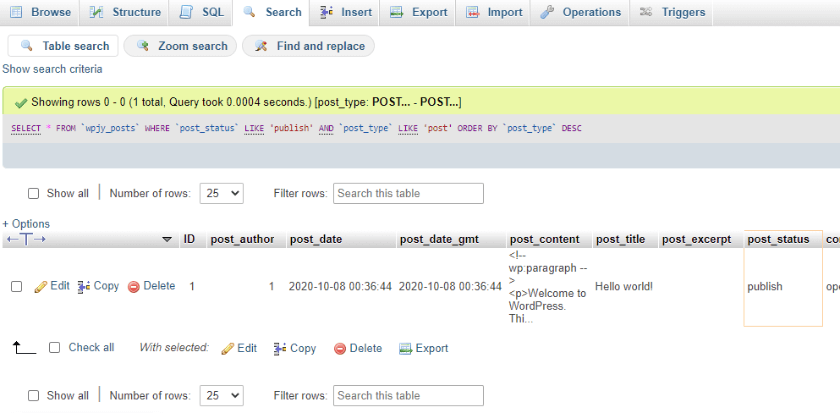
This will display only published WordPress posts. In my case, it only found one, which is correct.
Looking to Buy or Sell WordPress Sites?
At ReadyShip, we offer an all-in-one WordPress solution for those looking to start a blog or site, as well as the opportunity for WordPress developers or professionals to sell their products!
The End
Hopefully, in the future, WordPress will display the post IDs by default because it’s not hard to do, and a lot of users will benefit from it.
Until then, you can use one of these ways to find the WordPress post IDs.
If you have questions or thoughts, feel free to leave a comment below.

