After installing WordPress, you need to do some cleaning, change some essential settings, and add some important features. This will ensure that you’ll have a proper start.
I’ll only mention the general things that apply to almost all fresh WordPress installations. I’m not going to mention optional and preferential stuff, such as adding a contact form, just so I can have a bigger list.
Now, let’s see the first things to do after installing WordPress.
Contents
- Perform a 301 Redirect from HTTP to HTTPS
- Password-Protect Your WordPress Site
- Change the General Settings
- Change the Reading Settings
- Change the Discussion Settings
- Change the Permalinks Settings
- Delete Pre-installed/Unused Plugins
- Delete Pre-installed/Unused Themes
- Delete the Default Comment
- Delete the Default Pages
- Delete the Default Post
- Change the Uncategorized Category
- Check Site Health
- Change Some Core WordPress Configuration Settings
1. Perform a 301 Redirect from HTTP to HTTPS
For this part, I assume that you have an SSL certificate installed. If you can’t access your WordPress site via HTTPS (e.g. https://example.com), then talk to your host about how to install one.
Nowadays, more and more web hosts have started to automatically install SSL certificates for new WordPress sites, allowing them to be served securely via HTTPS, not HTTP.
What they don’t usually do is to also handle the redirection from HTTP to HTTPS, which affects:
- Security – Your WordPress site can still be accessed via the less secure version, HTTP;
- SEO (Search Engine Optimization) – You’ll have two versions of your site. For search engines, such as Google, this means two different sites, which leads to duplicate content issues. Your backlink profile can also be affected because some links can point to the HTTP version, while others to the HTTPS version. With a redirection in place, the link authority will be passed to a single, final version.
Luckily, WordPress handles the www to non-www redirection, or vice-versa. Otherwise, you’ll have four different versions of your site, not just two. 🙂
Now, there’s no one-size-fits-all solution when it comes to this kind of redirection. It depends on your web host and server type (e.g. Apache, Nginx). Since it’s pretty complex stuff, it would require a whole post to cover this.
Therefore, I recommend contacting your web host’s support to ask them to perform the redirection for you. They can easily do this. It will also be much easier for you.
This is probably the most important thing to do after installing WordPress, so don’t skip it!
Check your redirections
After the redirection is implemented, check if it works properly with this Redirect Checker tool.
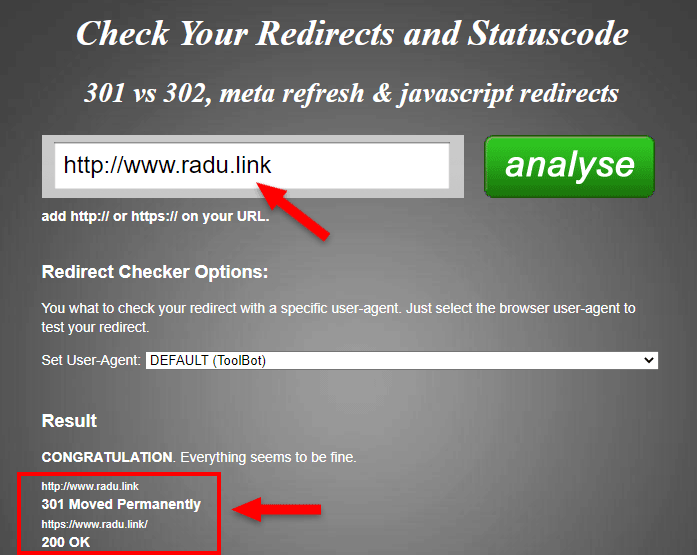
Check the following things:
- If every version is redirected to your desired version. For example, for the
non-wwwversion, the other three versions of your site need to point to the samehttps://address:http://example.com>https://example.comhttp://www.example.com>https://example.comhttps://www.example.com>https://example.com
- If the redirection has a 301 code, which means it moved permanently. Some hosts add a 302 redirection, which is not optimal for SEO because it means that the link only moved temporarily, and it will revert soon.
2. Password-Protect Your WordPress Site
I’m sure that some of you will be wondering why should you do this, so I’ll lay out the reasons first.
Prevent search engines from indexing all the mess
Until your WordPress site is ready to go live, it’s best not to allow search engines, such as Google, to crawl and index all the mess because you’ll start with poor SEO. Search engines can’t crawl password-protected content.
Most WordPress themes use dummy content, which is usually in Latin. So, for example, if you import one of the demos, your site’s content will be in Latin. You don’t want Google to associate your site with the Latin language, do you? 🙂
You want to start with the right content for the niche your site’s in.
The password-protection method is better and more reliable than adding a noindex tag to your site, or a Disallow rule in your robots.txt file, especially when you can easily forget about them.
Prevent spammers and hackers to mess with your site
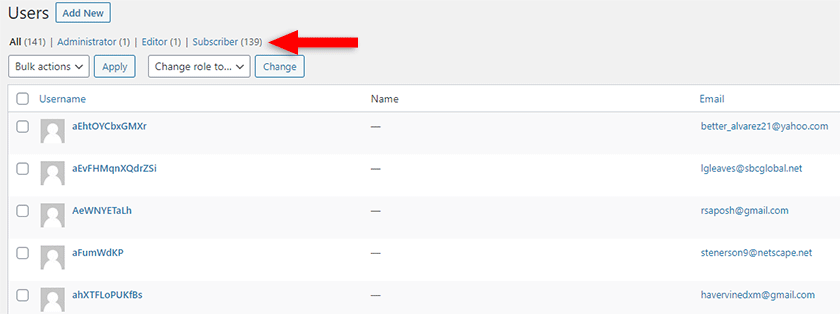
Until you implement some security and anti-spam features, you can wake up bombarded with spam comments and fake accounts.
For example, I forgot my password-protection plugin disabled on my WordPress testing site, and I woke up with 139 fake Subscriber accounts created.
Prevent the public to see your work in progress
I don’t know about you, but I don’t like the idea of people being able to see my “construction site” and all the ugly mess. I want them to see the beautiful, finished project.
Of course, there’s not a big chance for someone to see your WordPress site unless you mention it somewhere, but still…
How to password-protect your WordPress site
To password-protect your WordPress site, I recommend installing the Password Protected plugin. Here’s how to install a plugin in WordPress.
After you’ve installed it, head over to Settings > Password Protected to access its settings.
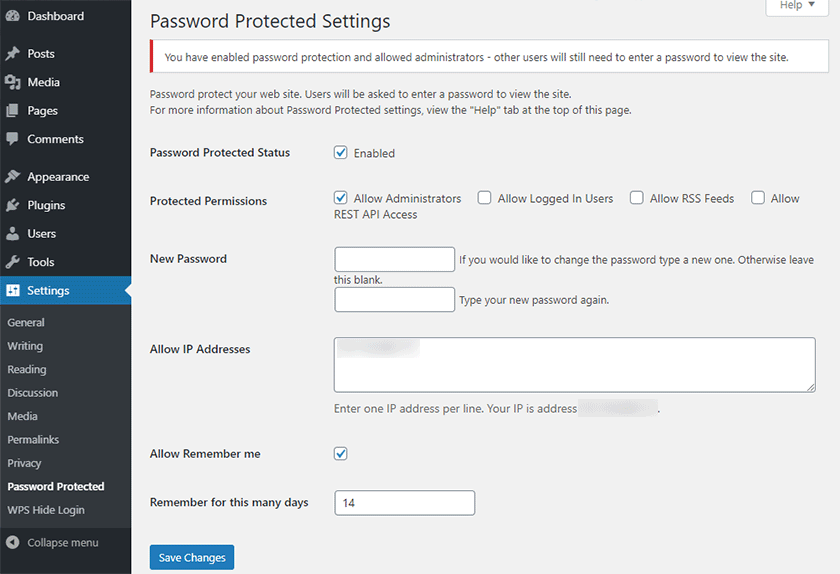
Here’s what I normally do:
- Check the Enabled box first, of course;
- Check Allow Administrators so I can view the front-end when I’m logged in as an Administrator;
- Add a New Password in case I want to share my website with someone, to check it out;
- Add my IP address in the Allow IP Addresses field so I can see the website even if I’m not logged in;
- Enable Allow Remember me for the people with whom I share my WordPress website, so they don’t have to add the password each time I ask them to check the site.
3. Change the General Settings
Next on my list of things to do after installing WordPress is to head over to Settings > General and change the options based on your preference, such as site language, time zone, etc.
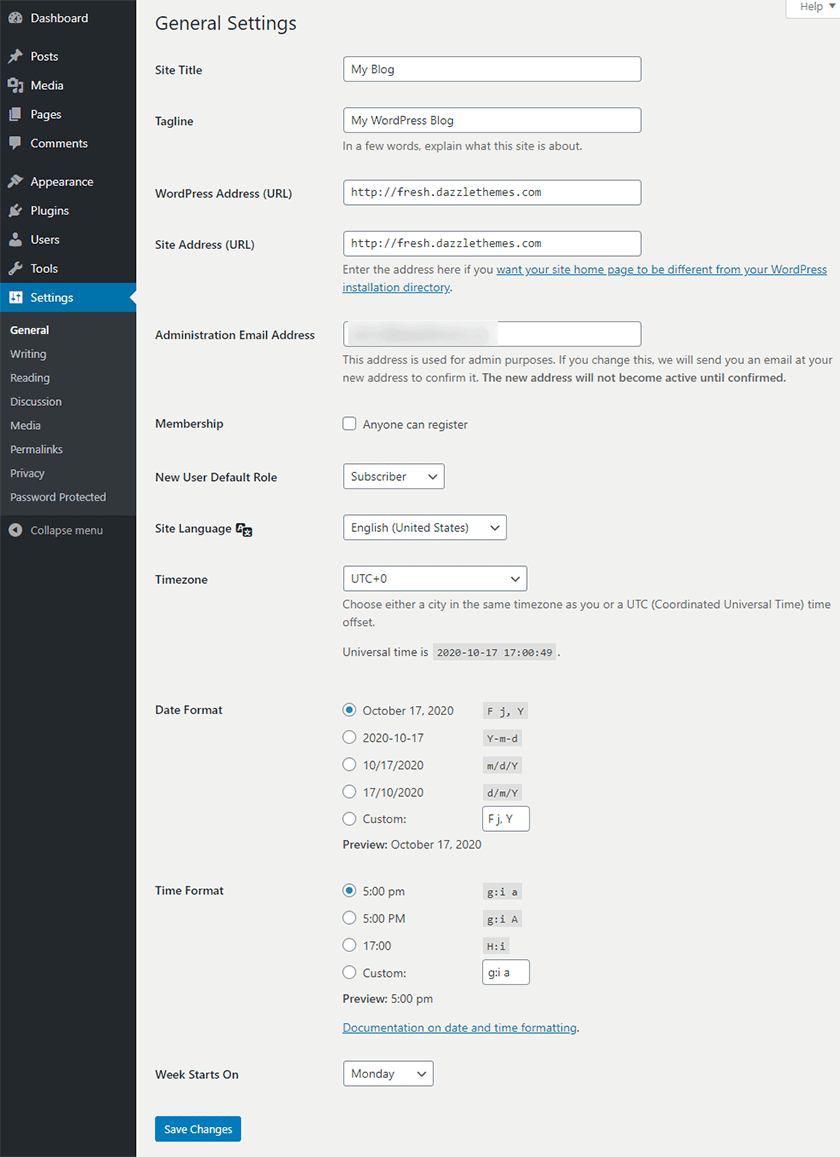
Don’t change the URL fields unless you have to and you know what you’re doing. Otherwise, you can lock yourself out.
For example, changing http:// to https:// when you don’t have an SSL certificate installed.
4. Change the Reading Settings
Go to Settings > Reading and change the Reading Settings if needed.
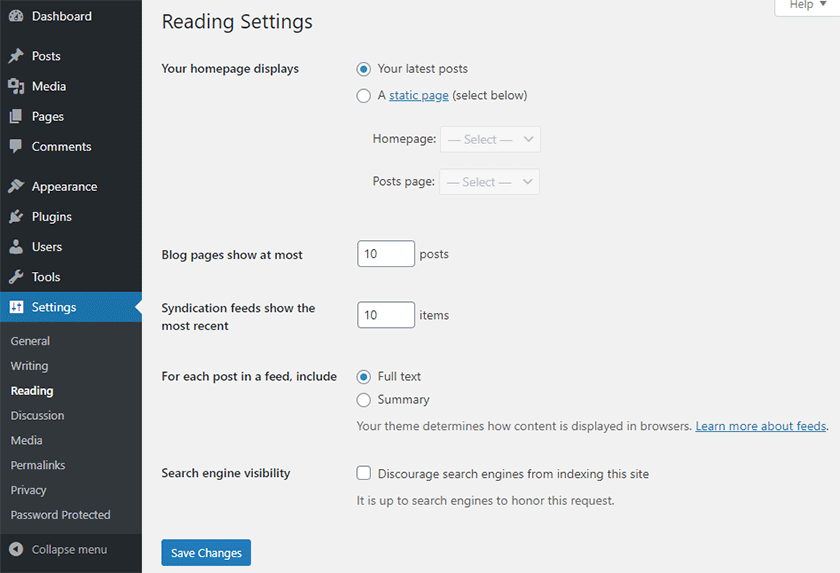
Let’s go through the options that might be difficult to understand and need extra info.
- Your homepage displays:
- Your latest posts – Select this if you have a standard blog, and you want your latest posts to appear on the homepage. Some WordPress themes might require a static page to be created instead;
- A static page – Select this if you have a website, and your homepage is a static page, such as a landing/presentation page. You have to create one (e.g. Home) in Pages, then select it.
- Blog pages show at most – It refers to the maximum number of posts that you want your blog page to display. I normally go with 5 for a standard, one-column blog;
- Syndication feeds show the most recent – “Syndication feeds” refers to your WordPress feed, which you can see by adding
/feed/after your domain (e.g.https://example.com/feed/). Some browsers only show raw code. To display it nicely in Chrome, you can use this RSS extension.
Looking for an All-in-One WordPress Solution?
ReadyShip offers you ready-made WordPress sites and blogs, plus high-quality managed AWS hosting with free SSL and CDN, at no initial cost!
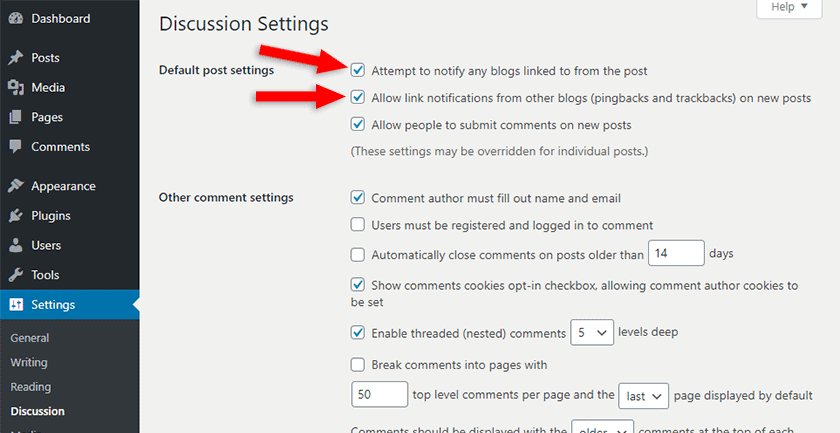
5. Change the Discussion Settings
Another thing to do after installing WordPress is to head over to Settings > Discussion, where you should disable the following settings because they’re useless, spammy, and can do more harm than good. Virtually no one uses them anymore.
- Attempt to notify any blogs linked to from the post – WordPress will ping the site you link to. If they have pingbacks enabled, your mention will appear in their comments section;
- Allow link notifications from other blogs (pingbacks and trackbacks) on new posts – This works as the first setting, but the other way around. If someone links to you, their mention appears in your comments section.
6. Change the Permalinks Settings
Go to Settings > Permalinks and choose Post name.
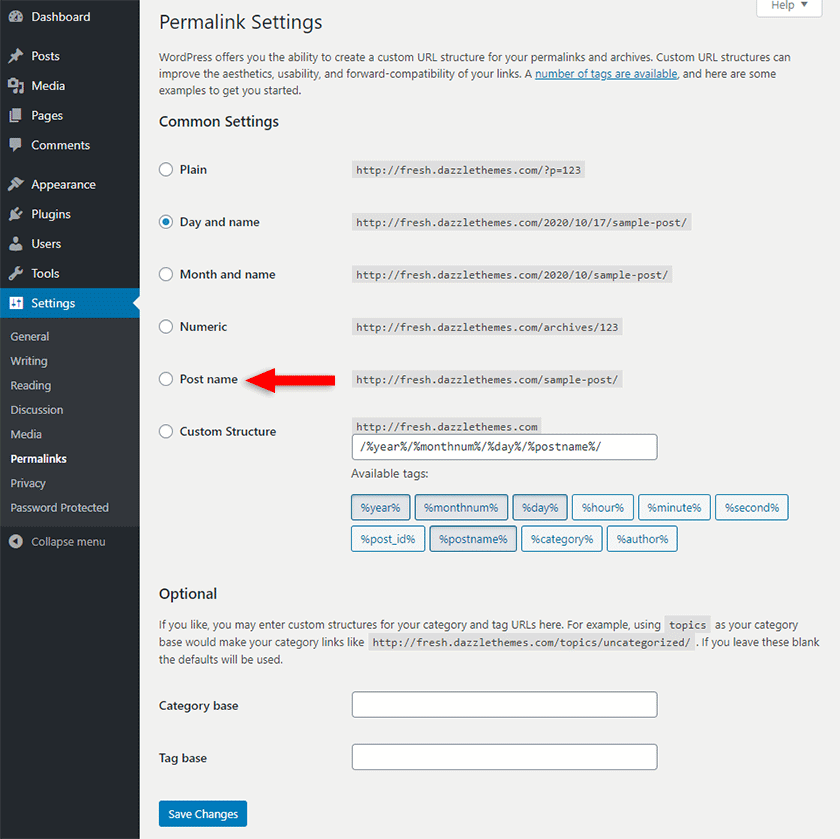
This makes the links look pretty, and it’s also the best practice when it comes to SEO.
Now, optionally, you can change your category and tag bases in the Optional section. For example, from the default https://example.com/category/ to https://example.com/topics/.
I recommend deciding before your blog goes live and using categories/tags. If you change them down the road, you’ll have to redirect all the old links to the new ones to prevent broken links that return 404 Page Not Found errors. Broken links can affect:
- SEO – If you have backlinks to those categories/tags, you’ll lose them once you change the base because they’ll point to the broken links;
- User Experience – Users might click on a link after you change the base and end up seeing a 404 error instead of a category/tag page. Some of them will leave without browsing your site further.
7. Delete Pre-installed/Unused Plugins
A default WordPress installation comes with two pre-installed plugins:
- Hello Dolly – Useless;
- Akismet – An anti-spam plugin that you can keep, but I don’t recommend it. There are better, lighter alternatives, such as Spam Destroyer. At least until you get a ton of traffic.
Certain software or platforms that install WordPress automatically could also add extra plugins that you might not need.
There are also cases where your WordPress installation will come with handpicked plugins for that particular blog or site. A ready-made WordPress site or blog from ReadyShip is a good example. In those cases, you should probably not delete them.
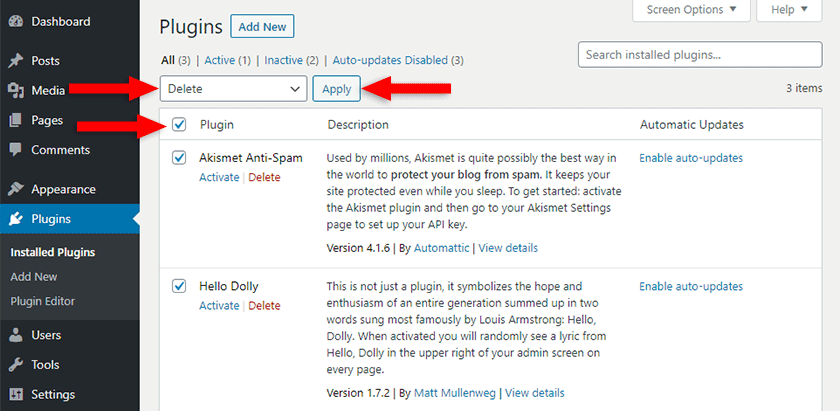
So, to delete pre-installed WordPress plugins that you don’t need, go to Plugins > Installed Plugins.
Check the box next to Plugin to select them in bulk, select Delete from the Bulk actions drop-down menu, then click Apply.
If a plugin’s activated, it needs to be deactivated first. Otherwise, it won’t get deleted.
8. Delete Pre-installed/Unused Themes
WordPress also comes with pre-installed themes by default. And, as I mentioned for plugins, different software or platforms that install WordPress for you can also add extra themes.
Except for the one you use and a default one, it’s best to delete them so you won’t be bugged with update notifications. They can also pose a security risk, even if they are deactivated. The same goes for plugins.
To delete unused WordPress themes, go to Appearance > Themes, hover over a deactivated theme, then click on Theme Details.
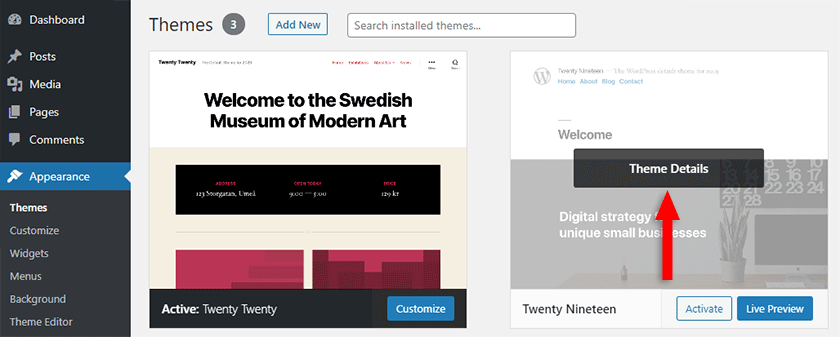
After that, click on the Delete link found at the bottom-right corner.
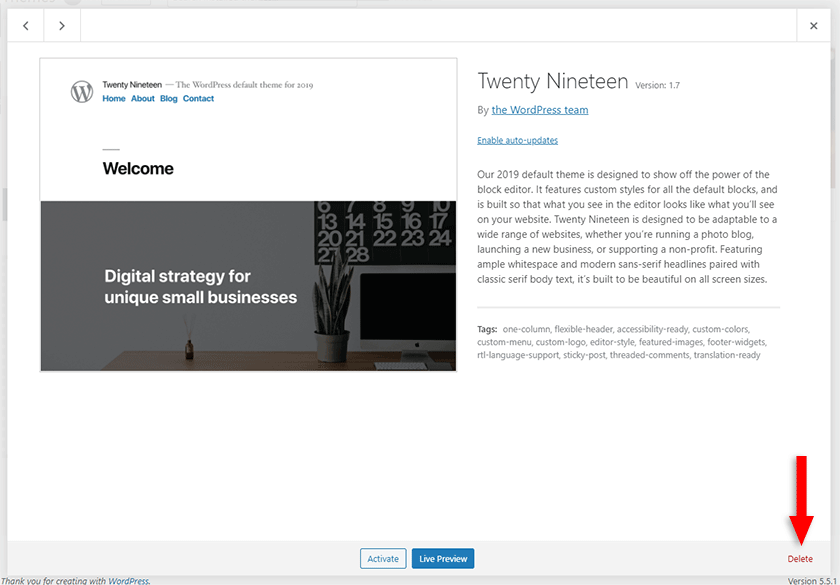
Do the same for the other ones. No, you can’t bulk delete themes from your dashboard, as you do with plugins. Sorry! 🙁
Notes:
- An Active theme can’t be deleted. You need to deactivate it first;
- WordPress always needs to have an active theme, which should be the one that you use;
- WordPress also recommends having a default theme installed, which will automatically be used if something goes wrong with yours. So, keep one of WordPress’ default themes installed (e.g. Twenty Twenty);
- Usually, you should have a child theme in place. That’s the only case when you’ll need to have three themes available:
- The parent theme – deactivated, but not deleted;
- The child theme – activated;
- A default theme – deactivated, but not deleted.
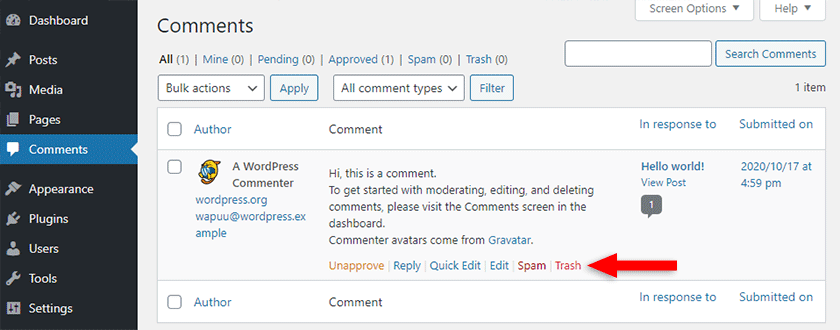
9. Delete the Default Comment
WordPress also comes with a demo comment, which you can find in the Comments section. Hover over it and click on Trash.
Looking to Buy or Sell WordPress Sites?
At ReadyShip, we offer an all-in-one WordPress solution for those looking to start a blog or site, as well as the opportunity for WordPress developers or professionals to sell their products!
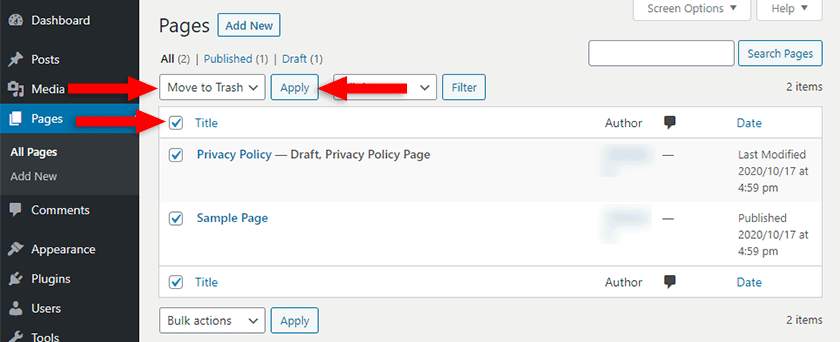
10. Delete the Default Pages
A standard WordPress installation comes with two default pages: Privacy Policy and Sample Page. There could be more, depending on what you use to install WordPress.
You can find them in Pages > All Pages. You can either edit and use those, or delete them to create your own from scratch.
To delete in bulk, check the box next to Title, select Move to Trash from the Bulk actions drop-down menu, then click Apply.
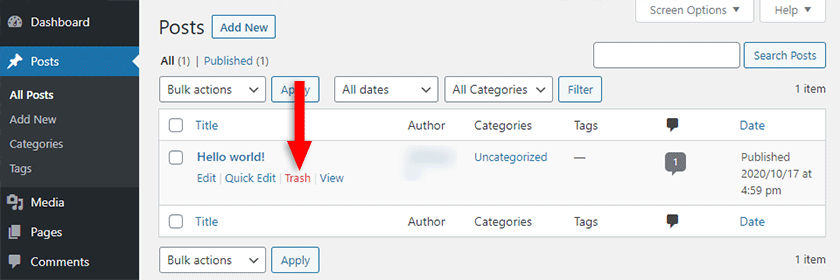
11. Delete the Default Post
There’s also one or more posts found in Posts > All Posts, depending on what you use to install WordPress. A default installation only comes with one.
To delete it, hover over it and click on Trash.
12. Change the Uncategorized Category
You can’t publish a post without attaching a category to it. So, WordPress comes with a default one called Uncategorized. This category is also selected by default when publishing a post.
Now, if you forget to set a different category, having the default one on your blog will look unprofessional. Therefore, I recommend that you change it to something else.
Go to Posts > Categories, hover over the Uncategorized category, and click on Quick Edit.

Change the Name and Slug to something else. For example, Other and other. The slug refers to the part of the URL that’s after the category base (e.g. https://example.com/category/other/).
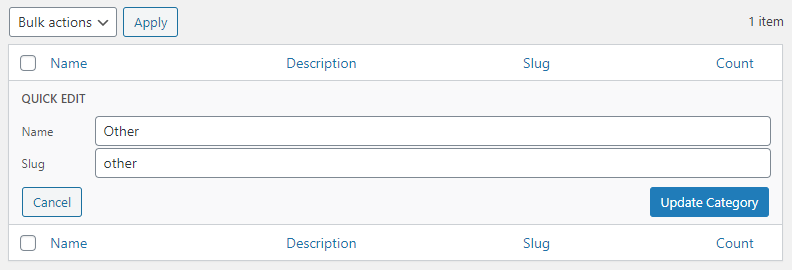
Don’t forget to click on the Update Category button.
13. Check Site Health
WordPress has a feature called Site Health, which you can access in Tools > Site Health. It performs different tests, and it shows warnings and recommendations regarding security and performance.
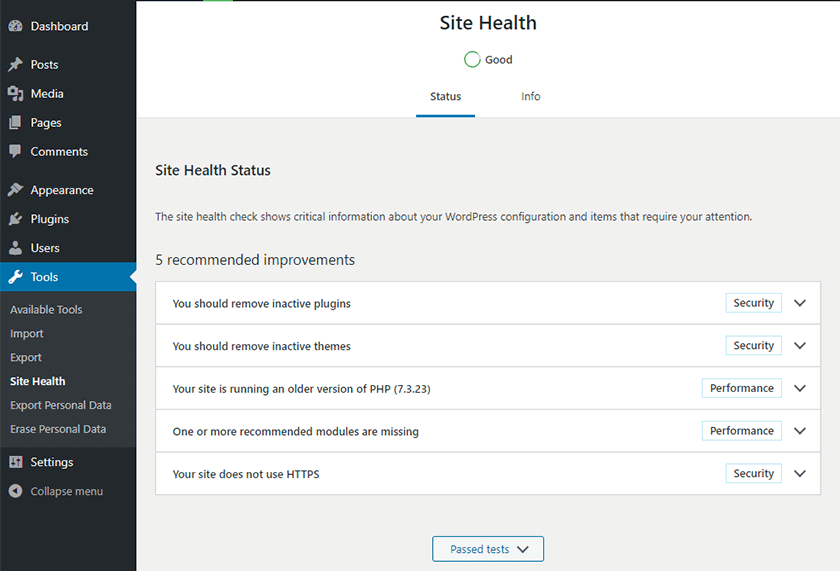
As you can see from my example, it recommends me to:
- Remove inactive plugins and themes, as I mentioned above as well;
- Upgrade my PHP version because it’s a bit outdated. Currently, the latest PHP version is 7.4;
- Install a recommended PHP module that I might need for some features;
- Use HTTPS.
The recommendations and warnings might differ depending on your setup. I recommend fixing all the warnings and implementing all the recommendations.
14. Change Some Core WordPress Configuration Settings
Finally, we’ve reached the last and a bit more complex part of my list of things to do after installing WordPress. I hope you’re still with me. 🙂
In a previous post, I showed you three different ways to access and edit your WordPress files. Let’s take advantage of that, and get our hands dirty a bit, shall we? 😀
I always recommend doing anything that you can manually, rather than installing plugins, which can lead to bloat, poor performance, security issues, and conflicts.
So, check the detailed tutorial that I linked to in the first paragraph, and access the wp-config.php file, which is a Core WordPress file, usually found in the public_html folder, or a folder with your domain name if you’re using an add-on domain, not your main one.
Open the wp-config.php file for editing, then add these three lines of code…
define('WP_POST_REVISIONS', 1);
define('EMPTY_TRASH_DAYS', 3);
define('DISALLOW_FILE_EDIT', true);
… right above this line
/* That's all, stop editing! Happy publishing. */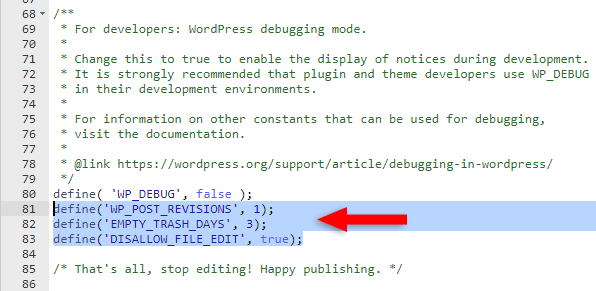
Let me explain what those snippets do:
define('WP_POST_REVISIONS', 1);– With every Save and Update, WordPress stores a post revision in the database, bloating the hell out of it. You don’t need 50 revisions for the same post, no? So, that code limits the revisions to 1. You can increase the limit by changing the number (1);define('EMPTY_TRASH_DAYS', 3);– This will automatically empty your Trash after 3 days. You can increase or decrease the number of days (3) if you want;define('DISALLOW_FILE_EDIT', true);– For security reasons, it’s best to disable the theme and plugin code editors from your Dashboard’s menu. That’s what this code does. If you want to edit your theme’s files, it’s best to use the 2nd or 3rd method shown in the tutorial that I linked to above.
Looking for an All-in-One WordPress Solution?
ReadyShip offers you ready-made WordPress sites and blogs, plus high-quality managed AWS hosting with free SSL and CDN, at no initial cost!
The End
There you go, folks! These are the first things I do after installing WordPress, and I recommend that you do them as well, so you can start with a good and clean foundation.
If you have any questions or want to pitch in, feel free to leave a comment.