
Regardless of having a simple presentation website, personal blog, or eShop, it’s vital to have a functional and reliable system that sends emails from WordPress, be it automated notifications or messages from contact forms.
WordPress already has a system built-in, based on the PHP mail() function (getting techy a bit 😀 ), but:
- It’s not so reliable when it comes to security and deliverability. A lot of emails might end up in the Spam/Junk folder, for example.
- It might not work on some WordPress hosting companies, either because it’s disabled or doesn’t get along with the server’s configuration.
On ReadyShip, the default mail function is not disabled, but it’s still recommended to configure SMTP in WordPress after you purchase a turnkey WordPress website.
So, that’s what I’m going to show you in this step-by-step tutorial. Don’t worry, it’s not hard. I got your back! 😀
What Is an SMTP – Quick Explanation
Before starting the configuration part, some of you might want to know a bit about SMTP and why is it better than WordPress’ default mail function.
SMTP stands for Simple Mail Transfer Protocol. The system consists of pretty complicated servers that are specifically set up to handle the receiving and sending of emails between the senders and receivers.
Since it’s not just a function from a programming language, but an entire system designed for handling emails, you can imagine that it’s a lot more secure and reliable.
If you want to, you can learn more about SMTP.
Looking to Buy or Sell WordPress Sites?
At ReadyShip, we offer an all-in-one WordPress solution for those looking to start a blog or site, as well as the opportunity for WordPress developers or professionals to sell their products!
Configure SMTP in WordPress with the “WP Mail SMTP” Plugin
Since configuring an SMTP in WordPress is not an easy thing to do, unless you’re a professional developer, you’ll need to use a plugin.
I’ve always used and recommended the WP Mail SMTP plugin. So, let’s see how to set it up.
Step 1
Install the WP Mail SMTP plugin. In case you need help with that, here are 4 different ways to install a plugin in WordPress.
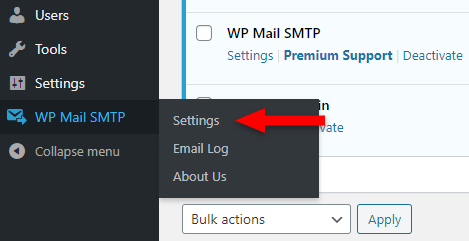
Step 2
From your dashboard’s menu, go to WP Mail SMTP > Settings to access the plugin’s options.
Step 3
Configure the settings in the General tab.
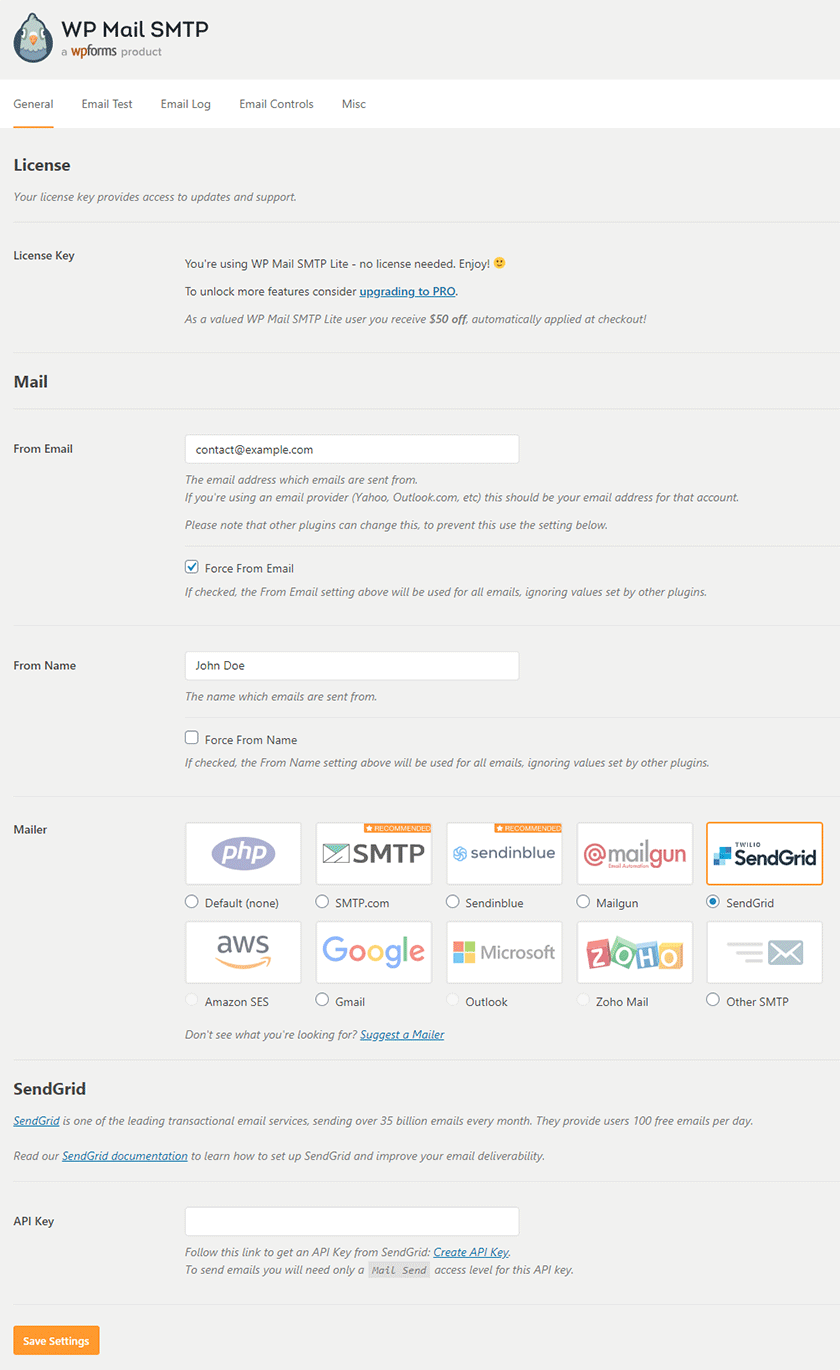
The Mail section:
- From Email: Add the email address from where the emails are being sent. It’s the email address that the receiver will see. For example, for the website
example.com, the From Email might becontact@example.com;- Force From Email: Other plugins might modify your email address set on the previous field. If you don’t want that to happen, check this box;
- From Name: Add the name of the person, website, or company that sends the emails. It’s the name that the receiver will see. For example, John Doe or AwesomeCats;
- Force From Name: Other plugins might modify the name set in the previous field. If you don’t want that to happen, check this box;
- Mailer: Choose an SMTP provider from the list, or pick Other SMTP if the provider is not listed there. Then, underneath, a new section will appear, where you’ll need to add some information to connect to your SMTP service. The information required depends on the provider. More details below.
I recommend choosing SMTP services from specialized providers, such as Elastic Email, Mailgun, SendGrid, and so on.
While some email hosting services, such as Gmail, provide access to their SMTP, I wouldn’t go with that. Email hosting is one thing, SMTP service is another. Usually, you should use both, each one for their main purpose.
In the above screenshot, I selected SendGrid as an example. And, as you can see, you only need to add the API key provided by SendGrid.
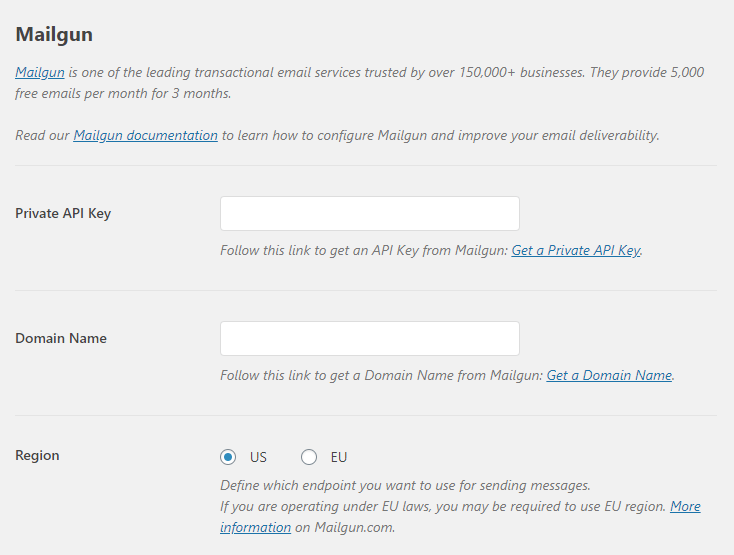
But other providers might ask for different or additional information, which is also provided by them. For example, for Mailgun, you need to also add your domain name and region.
Depending on the provider that you choose, another setting might pop up in the Mail section. It’s called Return Path.
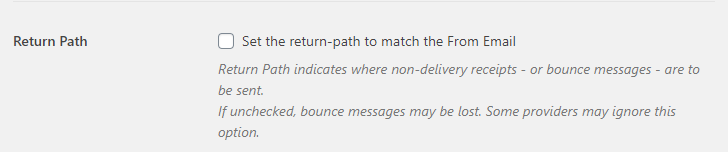
It’s a useful feature, and I recommend that you check the box to enable it. For example, if an email wasn’t delivered successfully, a report will be created automatically and sent to your previously chosen email address. So, you’ll know if something went wrong.
Why isn’t this setting available for every service listed in the Mailer? Well, probably, some providers handle that in their own way, and the WP Mail SMTP plugin doesn’t need to help. It’s also mentioned there that “Some providers may ignore this option.”.
If you choose Other SMTP to add a provider that’s not on the list, you’ll have the following options:
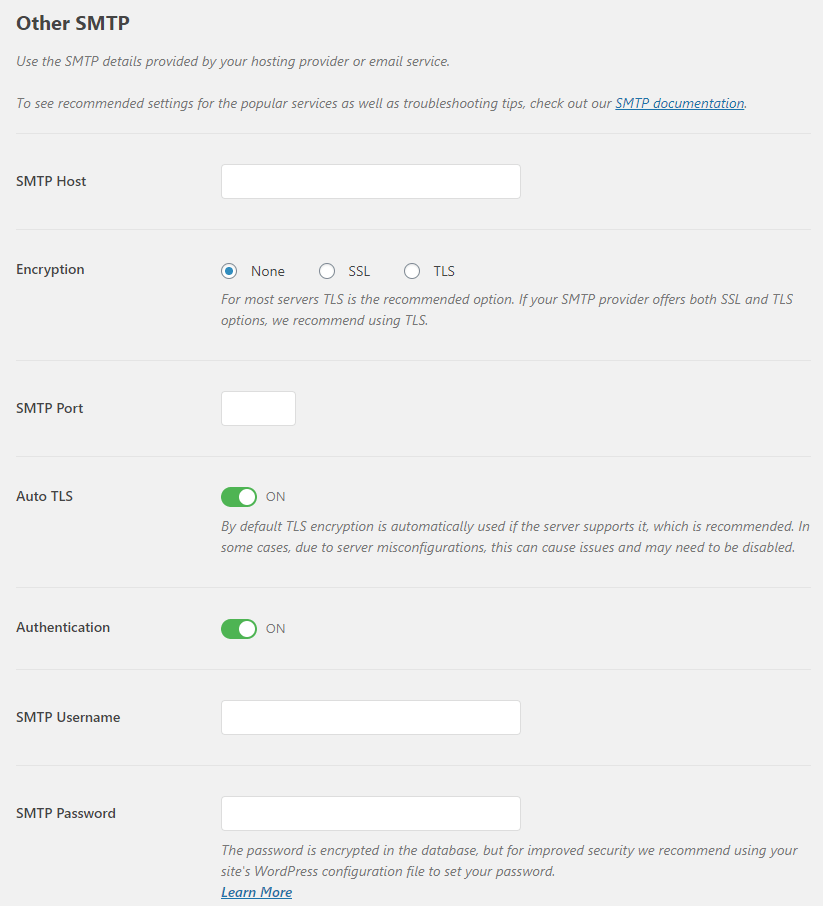
- SMTP Host: This is the host address of the SMTP server. It’s provided by the SMTP service. Usually, it looks something like this:
smtp.example.com; - Encryption: Usually, TLS is used, but you should find out if the SMTP provider offers TLS or SSL. If it only offers SSL, then select that one;
- SMTP Port: The most common ports are 587, usually used for TLS, and 465, usually used for SSL. The provider lets you know the right one. Your site’s hosting might block these ports, so if something doesn’t work, make sure you check with them.
- Auto TLS: It should be ON unless it doesn’t work properly. If something doesn’t work when testing, you can disable it for troubleshooting purposes;
- Authentication: It should be ON to add your SMTP Username and Password, which are provided by the service.
Step 4 – Optional, if you’re using Other SMTP
If you’re not using the Other SMTP option, then you can skip to the next step.
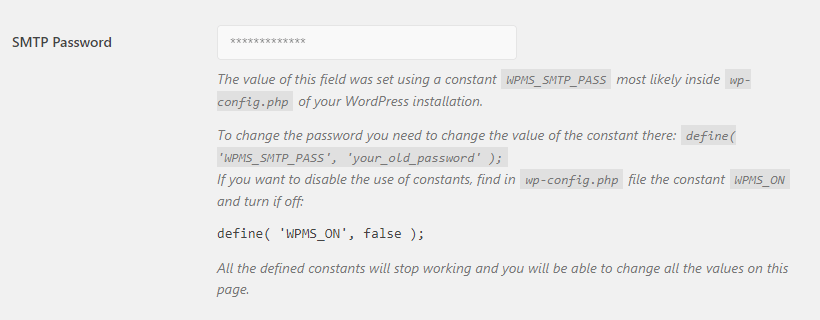
Under the SMTP Password field, it writes:
The password is encrypted in the database, but for improved security we recommend using your site’s WordPress configuration file to set your password.
To do that, you’ll have to access and edit your WordPress site’s wp-config.php file to add a snippet of code provided by the WP Mail SMTP developers. The file is found in the root folder, which is usually called public_html.
I’ve written a detailed tutorial that shows 3 ways to access and edit your WordPress files. The second or third method applies here.
So, follow that tutorial, and once you’ve opened the wp-config.php file for editing, add the following snippet directly above this line: /* That's all, stop editing! Happy publishing. */. It’s somewhere toward the bottom.
You’ll have to change the word password between the single quotes with your own SMTP password! Make sure that you don’t delete the single quotes in the process.
// Adding the SMTP password for WP Mail SMTP plugin
define( 'WPMS_ON', true ); // enabling constants
define( 'WPMS_SMTP_PASS', 'password' ); // SMTP authentication password, only used if WPMS_SMTP_AUTH is true
// End WP Mail SMTP snippet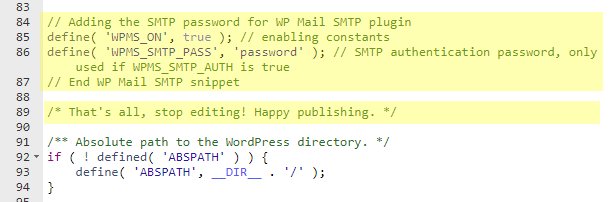
The two forward slashes // contain comments so you or a developer that might take a look at your WordPress site know what’s the code for.
To check if it worked, go back to the plugin’s settings. You should notice that a masked password appears, and the field is disabled, with a bunch of notes underneath.
Step 5
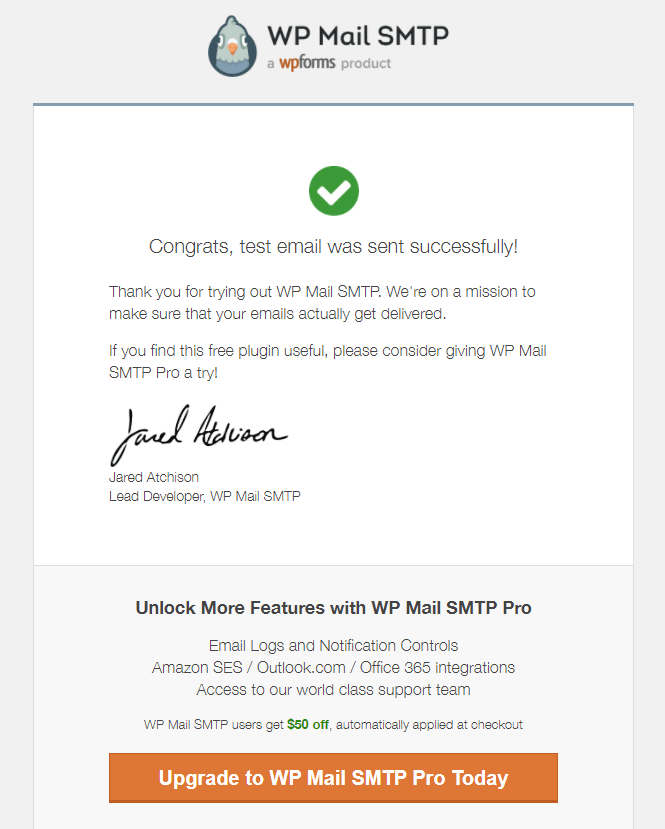
Go to the Email Test tab to test your configuration.
There, in the Send To field, add the email address to which you want to send the test. Then, click on the Send Email button. You can leave HTML turned ON.
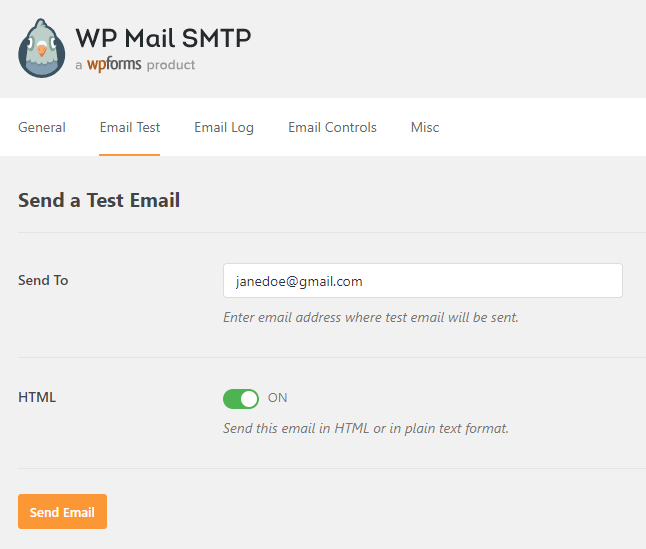
If you receive an email at the address that you entered, congratulations! You’ve successfully configured SMTP in WordPress with the WP Mail SMTP plugin.
Looking for an All-in-One WordPress Solution?
ReadyShip offers you ready-made WordPress sites and blogs, plus high-quality managed AWS hosting with free SSL and CDN, at no initial cost!
The End
I hope that the tutorial was comprehensive enough, and you managed to configure SMTP in WordPress with the WP Mail SMTP plugin.
If you didn’t succeed from the start, don’t panic and get frustrated. It’s not uncommon because there are a lot of different SMTP services and web hosts with different configurations. You might need to read their documentation or contact them in order to get the correct setup. I’ve been there as well.
If you have any questions or want to pitch in, feel free to leave a comment.